Zabbix is an enterprise level monitoring tool which monitors the entire IT infrastructure such as server, network and devices. Zabbix is completely an opensource and its currently supporting all major linux distribution like Debian, Ubuntu & CentOS. Read about Zabbix Installation on Debian based systems, Adding Zabbix Remote Linux Host & Adding Zabbix Remote Windows Host. Its high performance, high availability & high capacity which is capable to manage 1000+ devices at a time is really commendable. One can manage everything using the normal web interface. Zabbix announced the latest release of Zabbix 2.4.2 version on November 05, 2014. Alternatively you can install other network monitoring tools such as Nagios, Cacti, Monitorix, Munin & Icinga2.
1) Prerequisites for Zabbix
You should install EPEL Repository For some dependency package & LAMP stack before proceeding Zabbix installation.
2) Install Zabbix repository
You can directly download the repository configuration package from Zabbix website based on your distribution and version.
# Import Zabbix Signature #
rpm --import http://repo.zabbix.com/RPM-GPG-KEY-ZABBIX

# Zabbix repository For RHEL/CentOS 5 #
# rpm -Uvh http://repo.zabbix.com/zabbix/2.4/rhel/5/x86_64/zabbix-release-2.4-1.el5.noarch.rpm

# Zabbix repository For RHEL/CentOS 6 #
# rpm -Uvh http://repo.zabbix.com/zabbix/2.4/rhel/6/x86_64/zabbix-release-2.4-1.el6.noarch.rpm

# Zabbix repository For RHEL/CentOS 7 #
# rpm -Uvh http://repo.zabbix.com/zabbix/2.4/rhel/7/x86_64/zabbix-release-2.4-1.el7.noarch.rpm
3) Install Zabbix Server
Run the below command to install Zabbix server with mysql and front-end web interface. While installing you need to give mysql root password to create zabbix database.
# yum install zabbix-server-mysql zabbix-web-mysql zabbix-agent zabbix-java-gateway
4) Editing PHP configuration for Zabbix frontend
Apache configuration file for Zabbix frontend is located in /etc/httpd/conf.d/zabbix.conf. By default everything is fine and you need to add your time zone.
# nano /etc/httpd/conf.d/zabbix.conf
php_value date.timezone Asia/Kolkata

# Restart Apache Web Server in SysVinit Systeme #
# service httpd restart
or
# /etc/init.d/httpd restart

# Restart Apache Web Server in Systemd Systeme #
# systemctl restart httpd.service
or
# systemctl restart httpd
or
# /bin/systemctl restart httpd.service
5) Create MySQL Database for Zabbix
Create MySQL database to use as Zabbix back end. Create database, database user name and password.
# mysql -u root -p

mysql> CREATE DATABASE zabbix CHARACTER SET UTF8;
mysql> GRANT ALL PRIVILEGES on zabbix.* to 'zabbix'@'localhost' IDENTIFIED BY 'YOUR_PASSWORD';
mysql> FLUSH PRIVILEGES;
mysql> quit
Import Zabbix Schema, images & data which is available under /usr/share/doc/zabbix-server-mysql-2.4.7/create/ (Note : If you using any other version do modify according that)
# mysql -u zabbix -p zabbix < /usr/share/doc/zabbix-server-mysql-2.4.7/create/schema.sql
# mysql -u zabbix -p zabbix < /usr/share/doc/zabbix-server-mysql-2.4.7/create/images.sql
# mysql -u zabbix -p zabbix < /usr/share/doc/zabbix-server-mysql-2.4.7/create/data.sql
Update MySQL Database password into /etc/zabbix/zabbix_server.conf file and uncommet it.
DBPassword=YOUR_PASSWORD
Allow Zabbix port in firewall
# firewall-cmd --permanent --add-port=10050/tcp
# firewall-cmd --permanent --add-port=10051/tcp
# systemctl restart firewalld
Start/Restart services
# Start/Restart the service in SysVinit Systeme #
# service start zabbix-server
# service start zabbix-agent
# service restart httpd
# service restart mysql
# chkconfig zabbix-server on
# chkconfig zabbix-agent on

# Start/Restart the service in Systemd Systeme #
# systemctl start zabbix-server.service
# systemctl start zabbix-agent.service
# systemctl restart httpd.service
# systemctl restart mariadb.service
# systemctl enable zabbix-server.service
# systemctl enable zabbix-agent.service
6) Zabbix frontend installation
Navigate your browser tohttp://localhost/zabbix or http://IP-Address/zabbix or http://Domain-Name/zabbix and it will redirect to http://localhost/zabbix/setup.php
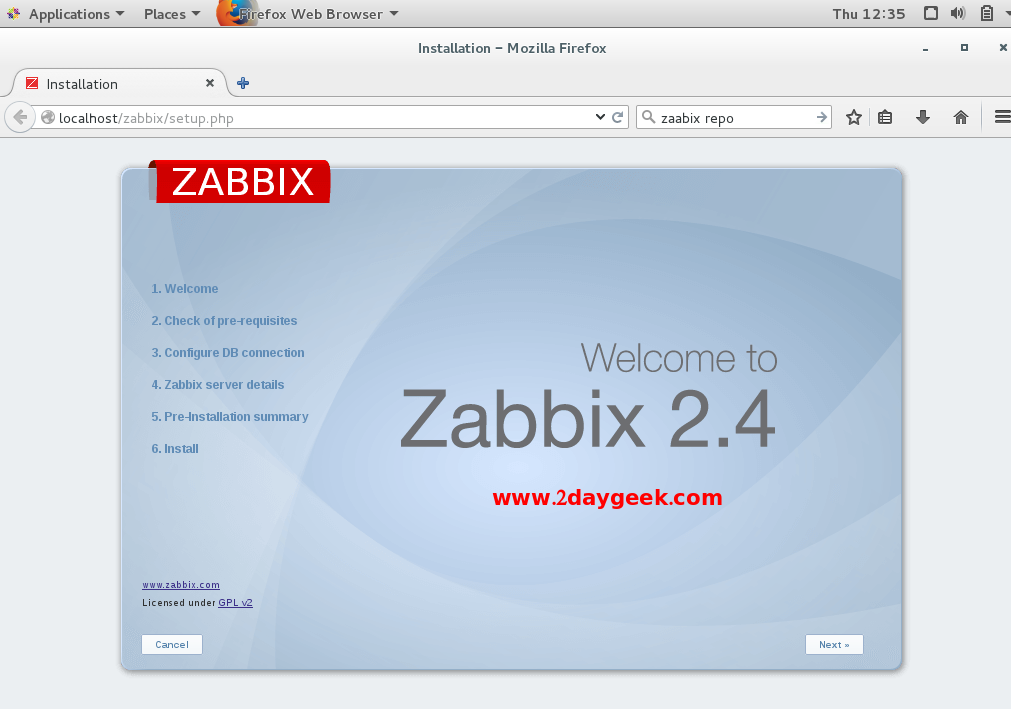
Zabbix 2.4.7 Welcome screen, Just hit NEXT to continue.
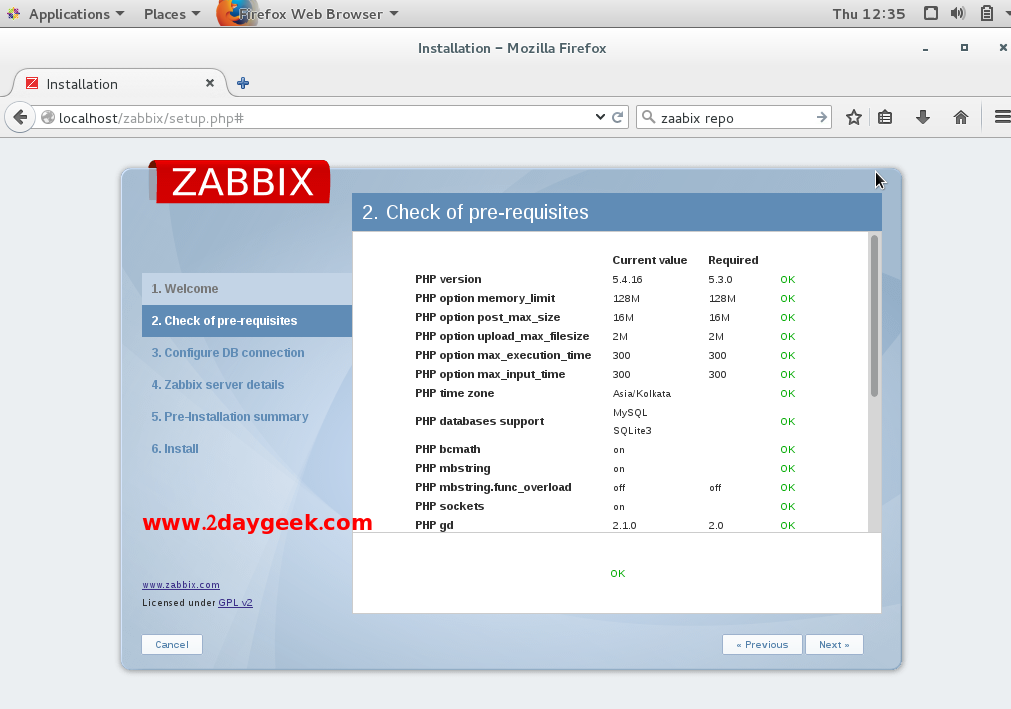
Checking all per-requisites packages which are available, then hit NEXT to continue.
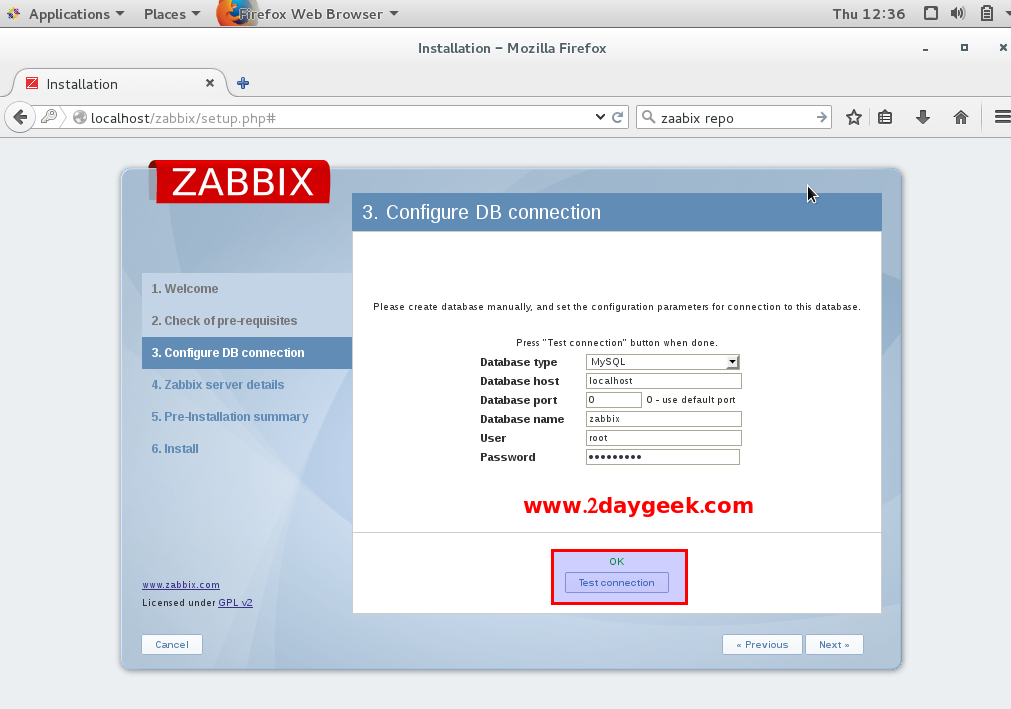
Enter Database details which you created also enter root database details, then hit Test Connection. If Test Connection is ok Click NEXT to continue.
Enter Zabbix server details here, then hit NEXT to continue.

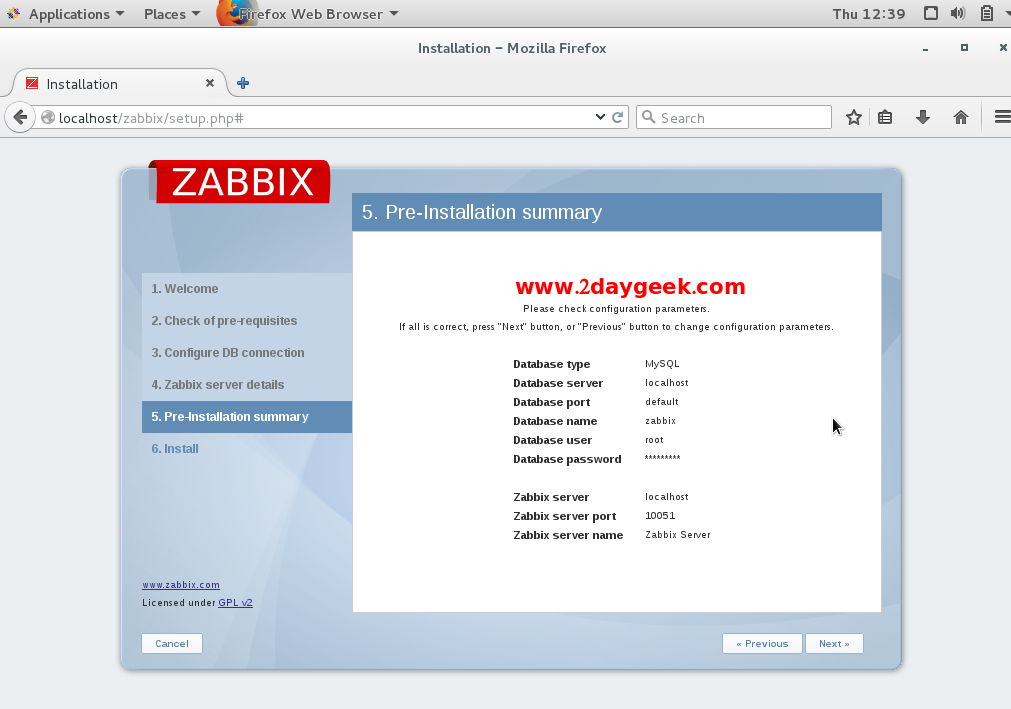
Check Pre-Installation Summary once, then hit NEXT to continue.
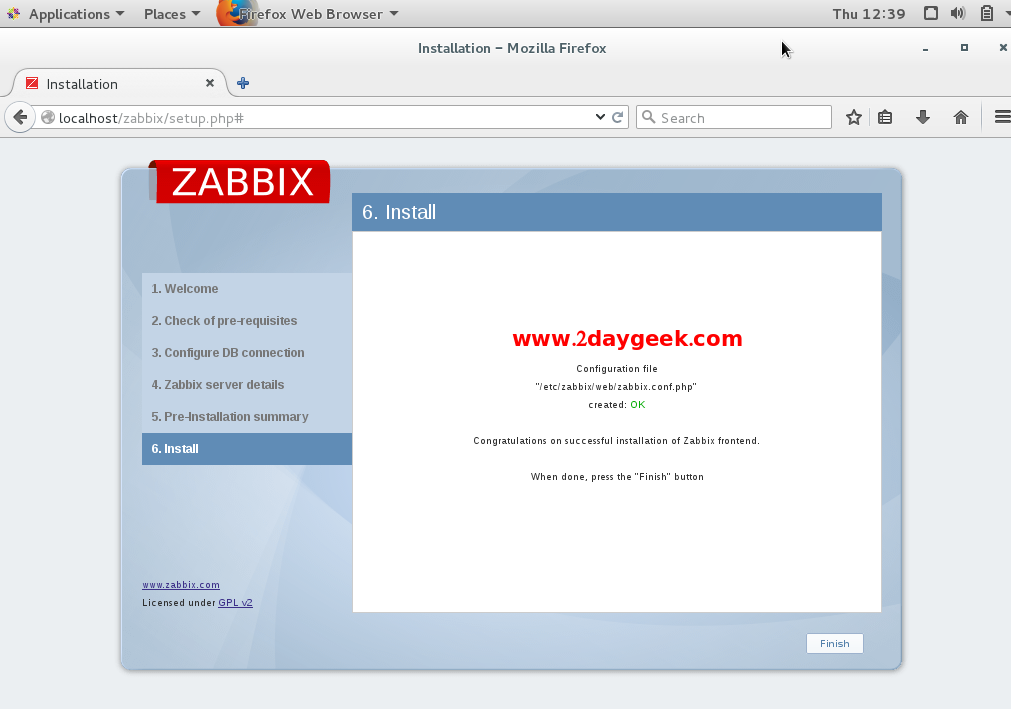
Click Finish to complete the installation.
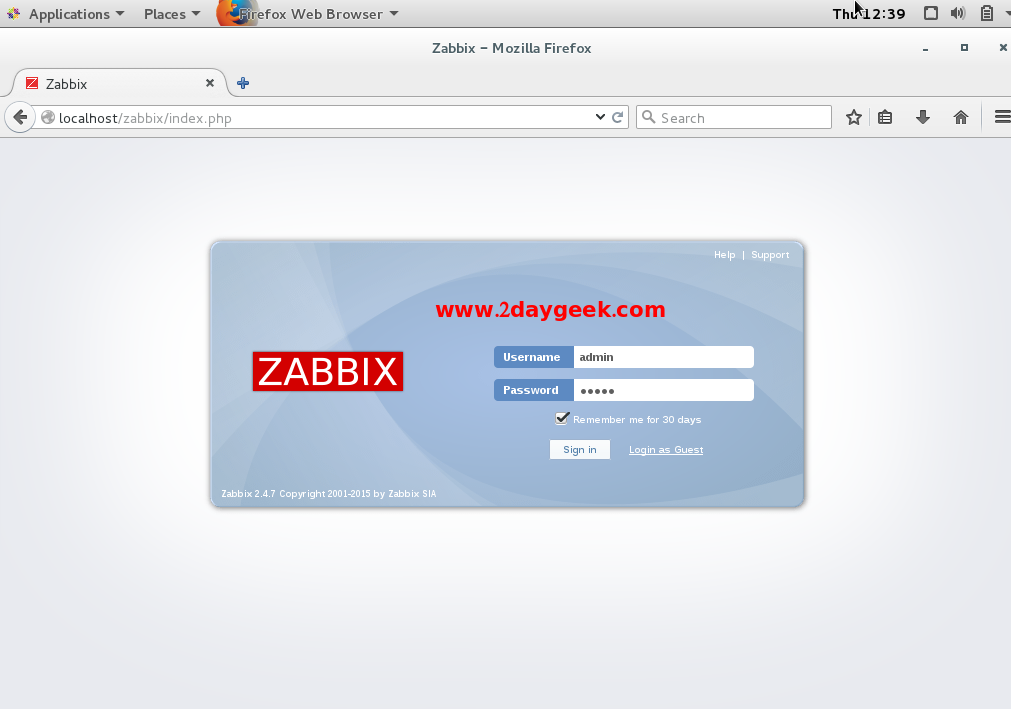
Login to Zabbix Web Interface, After hitting finish it will automatically redirect to login page. By default Username :admin and password Password : zabbix.
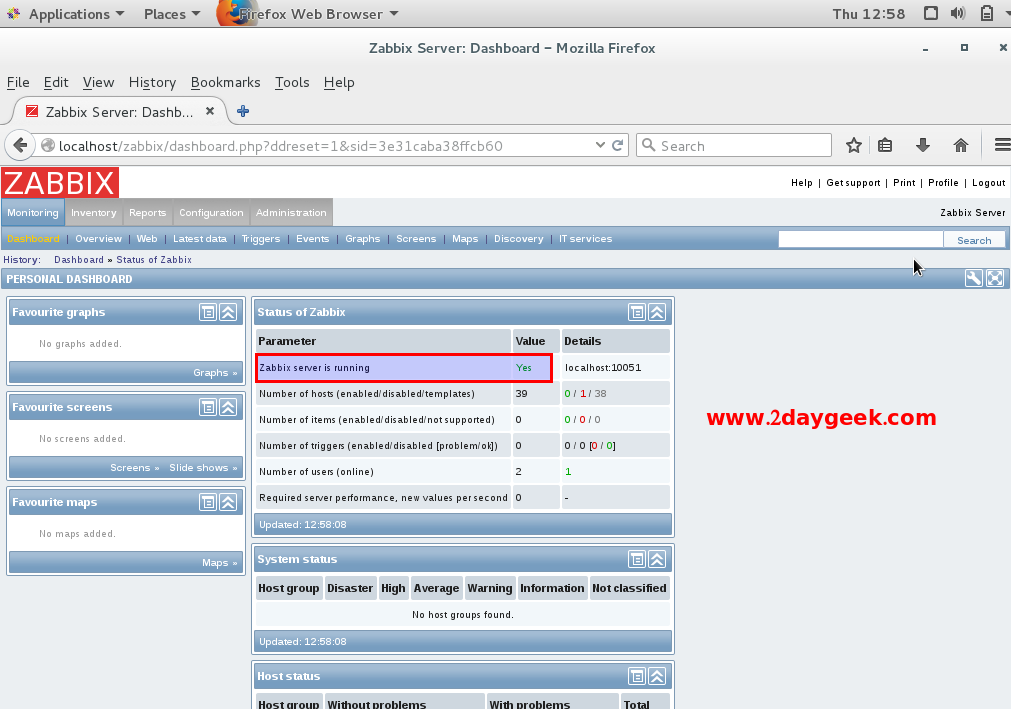
You have successfully installed Zabbix server. By default you will get this page after login.
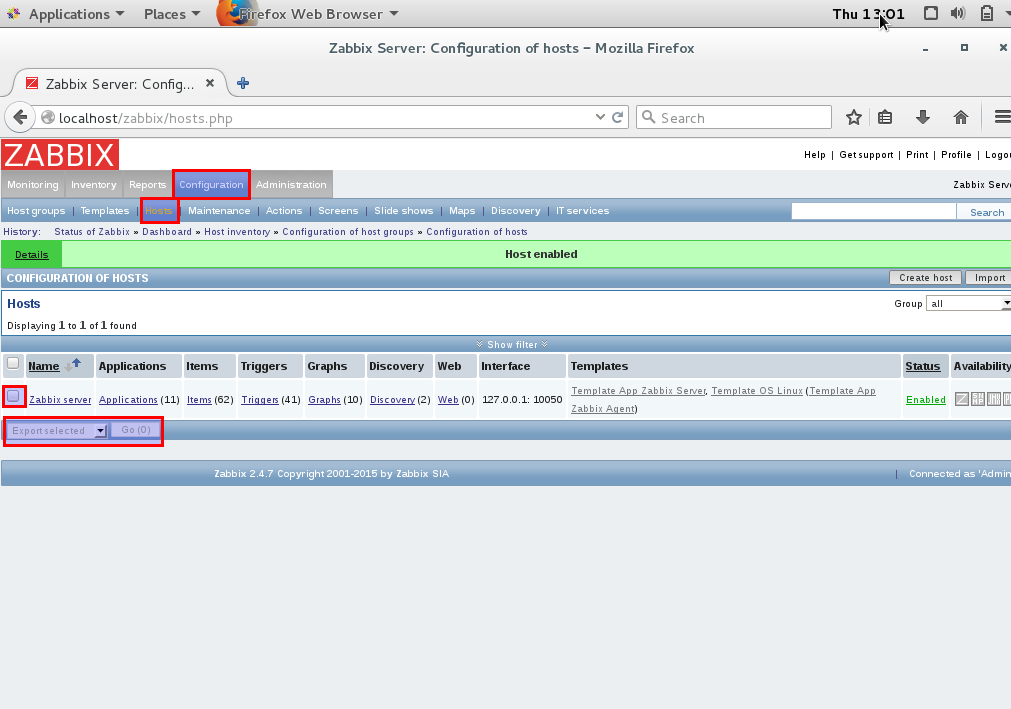
Checking zabbix server host : Configuration >> Hosts, By default zabbix server host added automatically but it's not enabled. Just choose the zabbix server and select "Enable Selected" from drop down box, then hti Go to enable it.
In this article we have clearly explained how to install Zabbix server 2.4.7 on CentOS & RHEL, Also rsefer the articles for Linux Remote Host adding & Windows Remote Host adding into Zabbix Server.
Post your valuable feedback/suggestions!! Thank you !!