Owncloud is excellent product but upgrade is headache, You can’t upgrade using Update Center When ever if you try to do on upgrade, it will shows some errors. Wednesday, July 23rd, 2014 owncloud 7 version launched, Now i’m going to upgrade in my owncloud from 6.0.4 to 7.0.1 using manually upgrade is better and standard one.
What’s New in ownCloud 7
1) Left side menu bar added in top, near by logo with drop down menu.
2) Newly they added few more option in left side bar. When you choosing any menu from the drop down it will shows. It good feature and very useful. By default its choose files menu. It will shows below list of new links which is not in earlier versions.
- All files
- Shared with you
- Shared with others
- Shared by link
- External storage
3) In users page few more rows added. Like (Storage location & Last login) and you can filter the user based on group.
4) They modified few more minor changes. Like (Upload button changed, Navigation menu style changed, deleted files folder they removed from navigation menu and added to side bar
5) They modified few more major changes. Like above three and overall user interface. Fixed lots of bugs and now its more user friendly
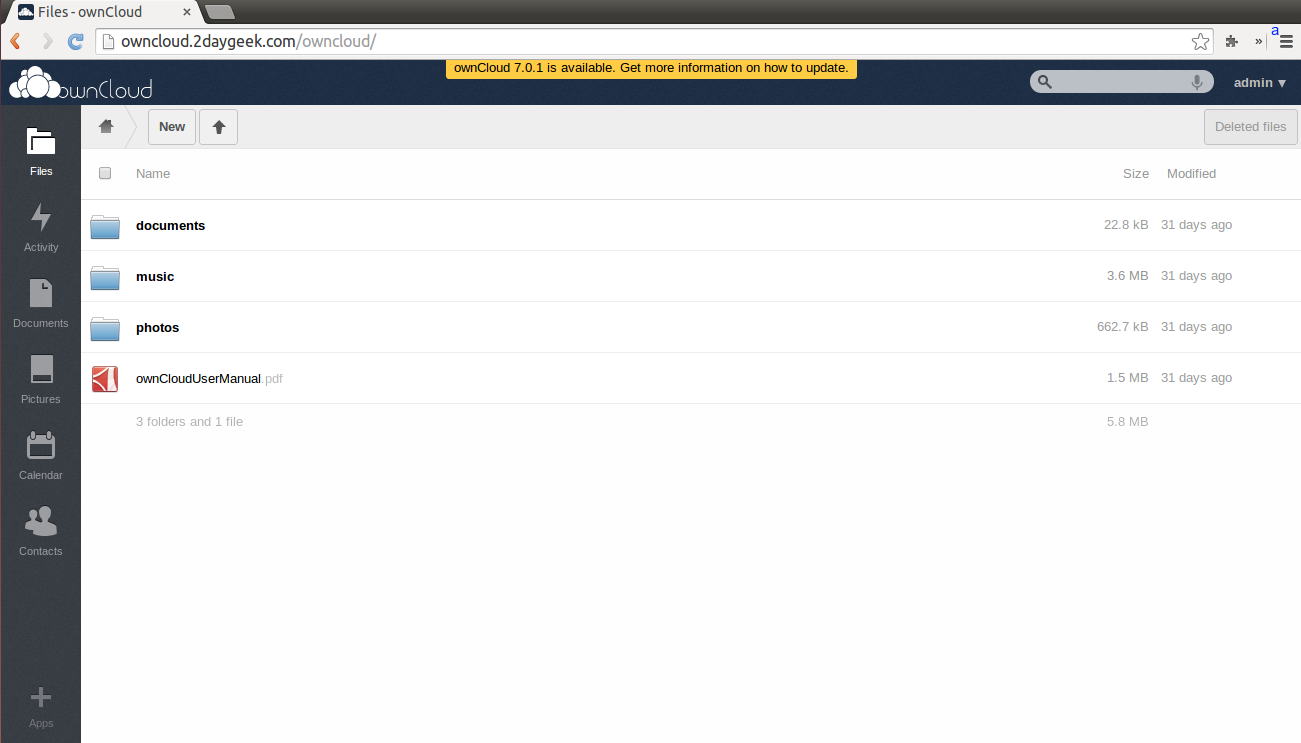
Step-1
See the below screen shot, In admin page its shows ownCoud 7.0.1 is available. Get more information on how to update
Step-2
Before upgrading, backup your owncloud directory and database for safety purpose.
# tar -zcvf /home/owncloud2daygeek/public_html/owncloud6-05-Aug-2014.tar.gz /home/owncloud2daygeek/public_html/owncloud

# mysqldump -u root -p owncloud > owncloud.sql
Enter Password *****
Step-3
Download the latest version of owncloud archive file using wget command under /opt directory and extract, then remove config directory.
# /opt
# wget https://download.owncloud.org/community/owncloud-7.0.1.tar.bz2
# tar -xjvf owncloud-7.0.1.tar.bz2
# rm -Rf config
# chown -R USER:USER /opt/owncloud
Step-4
Deactivate all third party applications. (Its not necessary, anyhow will deactivate as per owncloud instruction)
>> admin >> + Apps >> plugin name 3rd party >> If so, deactivate.
Step-5
Delete everything from your ownCloud installation directory, except data and config folder. Make sure you should remove hiden files too.
# rm -Rf 3rdparty apps AUTHORS console.php COPYING-AGPL core cron.php db_structure.xml index.html index.php indie.json l10n lib occ ocs ocs-provider public.php remote.php resources robots.txt settings status.php themes version.php .htaccess .tag .user.ini
Step-6
Move all the files and folder to your owncloud installation directory from /opt/owncloud. Make sure you should move hidden files too.
# mv /opt/owncloud/* /var/www/dev.2daygeek.com/public_html/owncloud
# mv /opt/owncloud/.htaccess .tag .user.ini /var/www/dev.2daygeek.com/public_html/owncloud
Step-7
Navigate your browser to owncloud installation directory. In my case http://owncloud.2daygeek.com/owncloud/ and it will shows blow screen shot. Hit Start update button and wait until the process is complete.

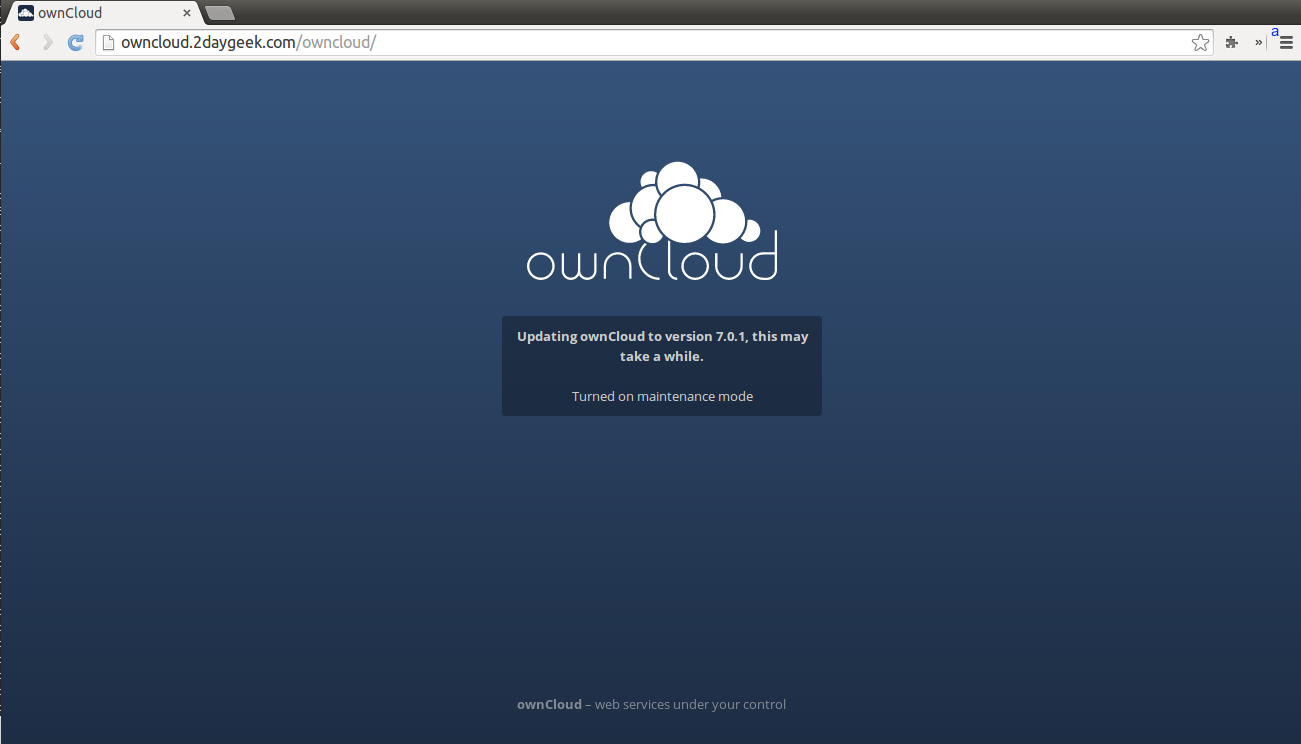
Step-8
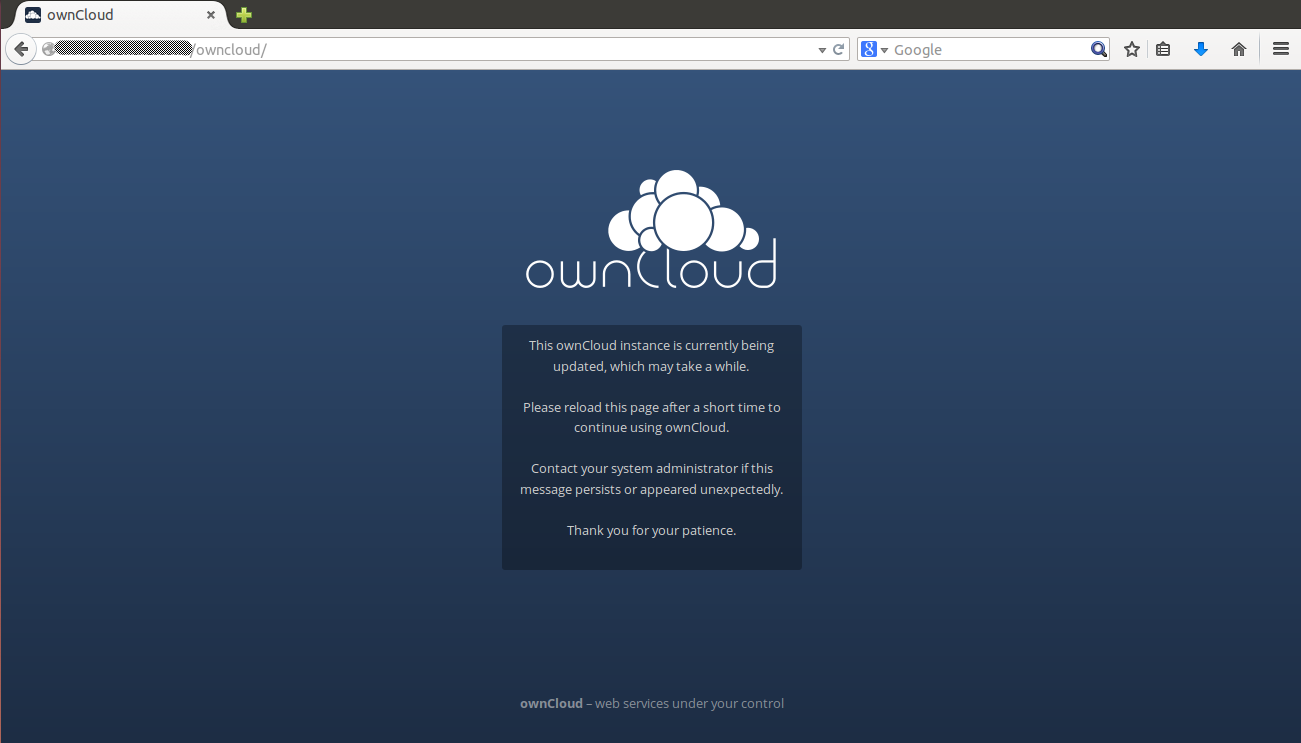
While upgrading, it will turned on maintenance mode on your owncloud installation directory. See below both screen shots.
a) Upgrading process screen shot.
b) Owncloud installed URL shows maintenance mode on. See the below screen shot.
Step-9
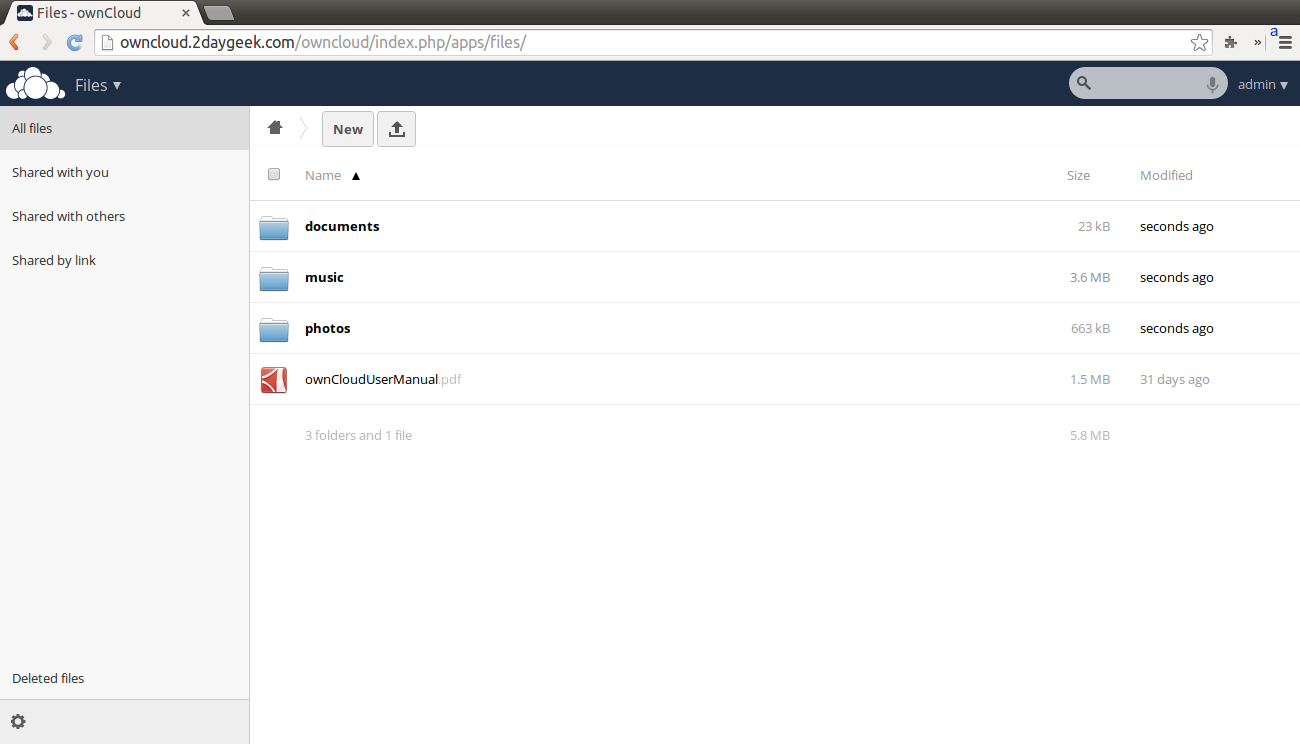
After putting maintenance mode on your URL, it will update all the necessary files which is involved in upgrade. After completing upgrade.

It will redirect you to owncloud admin page.
Step-10
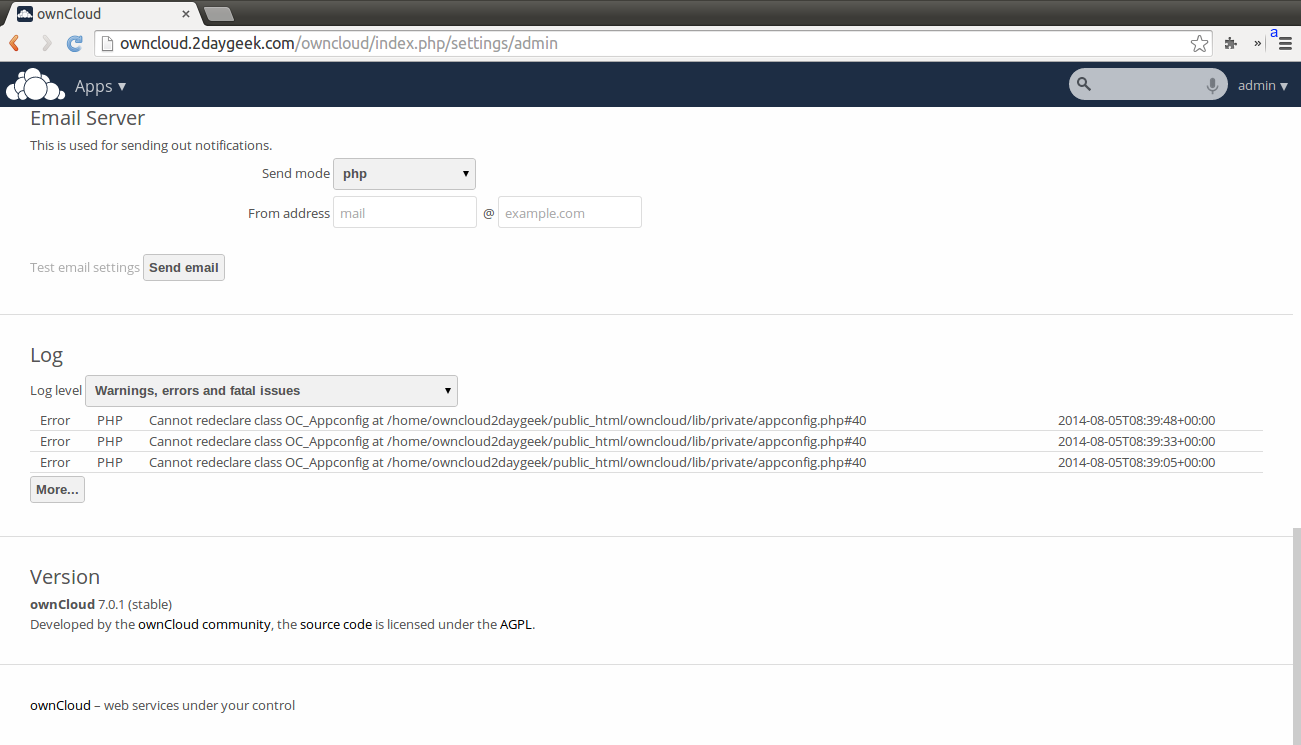
Now, the popup menu will not appear because you are in latest version. If you doubt. Go to >> admin >> scroll down and see the current version of owncloud installed on your server.
We are preparing all articles in-depth to understand by all level/stage Linux administrators. If the article is useful for you, then please spend less than a minute to share your valuable comments in our commenting section.
Please stay tune with us…Good Luck.


Thank you for the guide, I’ve succeeded upgrading from owncloud 6.x to 7.0.1. When I tried to upgrade again to 8.0.2 using the same steps it doesn’t work. Now, when I accessed my owncloud, it shows nothing but a blank white space. Any thoughts?
@Mike,
Follow the below link for owncloud 8 upgrade.
https://www.2daygeek.com/owncloud-8-0-release-notes-and-upgrade-steps/
Have an instance still showing “ownCloud 7.0.3 is available.ownCloud 7.0.3 is available”, even though Admin/Version shows:
ownCloud 7.0.4 (stable)
Is there a way to resolve this?
@lee,
Logout from owncloud and clear your cookies & caches then check it.
@MikeL,
No, I upgraded my production server & testing server but i didn’t face any issue as Deinb stated. Did you disabled all third party plugin before upgrading because that only causes.
Did you figure out the issue Deinb described? I am seeing exactly the same thing after using updater for 7.0.2 and 7.0.3 on different servers.
@Briana S Cooper,
Some time that also work fine but most of the time the auto upgrade option not working properly.
If you did without any trouble then no issues, good to hear.
I went ahead and ran the auto updater. It worked for me fine. I’m also using hostgator.
@Will Loving,
glade to hear.
I just followed these steps exactly on my Ubuntu 14.04 system from 6.0.4 to 7.0.2 and it worked perfectly! Thank you!
Will
Ok sent by email.
@Deinb,
Can you share me the screen shot.
Thanks for the update but I should have explained, I was starting from 6.0.4 and I was upgrading to 7.0.2 direct… unfortunately web UI still is broken as I described above and I cannot work out. Thanks.
@Deinb
I have upgraded from 7.0.1 to 7.0.2 using above method and everything working as a normal. See the below link.
https://www.2daygeek.com/owncloud-upgrade-from-7-0-1-to-7-0-2-in-linux/
@Deinb,
Still i didn’t upgraded my owncloud. Will upgrade and and update you with more details.
To give further information; I tried fresh 7.0.2. installation and there are no issues with web UI rendering. In the installation upgraded using instructions here, the web UI for “Files”, “Documents” and “Pictures” sections are rendered broken – all form elements appear jumbled, though clicking on them individually appears to works. The “Activity” section appears fine as with the “Personal”, “Users” and “Admin” settings pages…
Hi, tried these steps with 7.0.2 and though it seems successful (desktop client is working well with the files), the UI is broken when logging in. It appears as if all buttons, table rows etc are rendered together on top of each other in the top left corner of the screen (tried all major browsers), almost as if it’s bad HTML/CSS, but not sure what could cause that…
Thanks.
Hi Paul D,
Thanks.
Just went from a ver6 to the latest 7.0.1 following the above directions. I have a windows server but the directions were more or less identical if you understand the basics. Now i just need to go validate all the basic app functions are working. Looks good so far. Thanks for the concise instructions.