Every company maintains the ticketing system to track user request. Ticketing tool is one of the essential application in the IT industry.
You can find a lot of ticketing tools in the market and each one has their own unique features. Wide range of options are available to choose between them, so you have to pick suitable one for you as per your requirement.
Every company (small level to top level) has manage ticketing systems as per their needs.Are you looking for good ticketing systems with Free of cost? If yes, then otrs is the best choice for you.
Today we are going to discuss about otrs ticketing system which comes completely free of cost. Also you can find so many free ticketing tools in the market.
Suggested Read : osTicket Installation And Configuration On Linux
What is OTRS?
OTRS stands for Open-source Ticket Request System is one of the most flexible web-based ticketing systems used for Customer Service, Help Desk, IT Service Management.
OTRS Free package offers wide range of configuration (more than 1,000) possibilities, endless customization and integration possibilities which turning it into a powerful IT service management tool. It supports 38 languages.
Every ticket has the history which shows detailed information about the ticket. It supports multiple agents that allows user to work simultaneously on the tickets. There is no limitation for agents creation and agent can handle “N” of tickets per day.
It allow agent to manage incoming inquiries, complaints, support requests, defect reports, and other communications. Also user can able to merge more than one requests which generated for the same issue.
OTRS was written in Perl programming language and web interface is made more user-friendly by using JavaScript. The web interface itself uses its own templating mechanism called DTL (Dynamic Template Language) to facilitate the display of the systems output data.
Prerequisites for OTRS
Make sure your system should have LAMP setup. If not, don’t worry and refer the following tutorials to install it.
Suggested Read : Install LAMP Stack On CentOS 7 & RHEL 7
# yum install httpd httpd-devel gcc mariadb-server
Also enable EPEL Repository which will install some additional perl modules for OTRS.
# yum install epel-release
Update your system
It’s a good practice to make your system packages up to date. Run the following command as root user.
# yum update
Setup the database for OTRS
OTRS supports different database back-end like MySQL or MariaDB, PostgreSQL or Oracle. MariaDB is the most popular database to deploy OTRS that was suggested by OTRS team.
No need to create a database manually and we can create this later using OTRS web interface. Just configure the following settings.
Modify the following parameter in order to make it suitable for OTRS.
# vi /etc/my.cnf

[mysqld]
max_allowed_packet   = 64M
query_cache_size     = 32M
innodb_log_file_size = 256M
Restart MariaDB service to take this change effect.
# systemctl restart mariadb
Disable SELinux
SELinux stands for Security-Enhanced Linux is a Linux kernel security module which allows users and administrators more control over access control. It gives that extra layer of security to the resources in the system.
Check whether SELinux enabled or disabled using following command.
# sestatus
SELinux status:                 enabled

or

# getenforce
Enabled
If it is enabled, edit /etc/sysconfig/selinux file and change SELINUX=enabled to SELINUX=disabled and save the file then exit.
# nano /etc/sysconfig/selinux

# This file controls the state of SELinux on the system.
# SELINUX= can take one of these three values:
#     enabled - SELinux security policy is enforced.
#     permissive - SELinux prints warnings instead of enabled.
#     enabled - No SELinux policy is loaded.
SELINUX=disabled
# SELINUXTYPE= can take one of three two values:
#     targeted - Targeted processes are protected,
#     minimum - Modification of targeted policy. Only selected processes are protected.
#     mls - Multi Level Security protection.
SELINUXTYPE=targeted
Reboot the system for the changes to take effect.
# shutdown -r now
Download and install OTRS
Download OTRS rpm file from the OTRS website and install it.
# yum -y install http://ftp.otrs.org/pub/otrs/RPMS/rhel/7/otrs-6.0.3-02.noarch.rpm
Restart Apache web server to load the configuration changes for OTRS.
# systemctl restart httpd
Configure firewall
By default CentOS/RHEL 7 will block all http and https traffic. We need to allow this traffic using following commands.
# firewall-cmd --add-service=http --permanent
success

# firewall-cmd --add-service=https --permanent
success

# firewall-cmd --reload
success

# systemctl restart firewalld
Check and install additional Perl Modules
Since OTRS written in perl and you may need to install additonal perl modules manually. Run the following command to check what modules you are missing.
# /opt/otrs/bin/otrs.CheckModules.pl
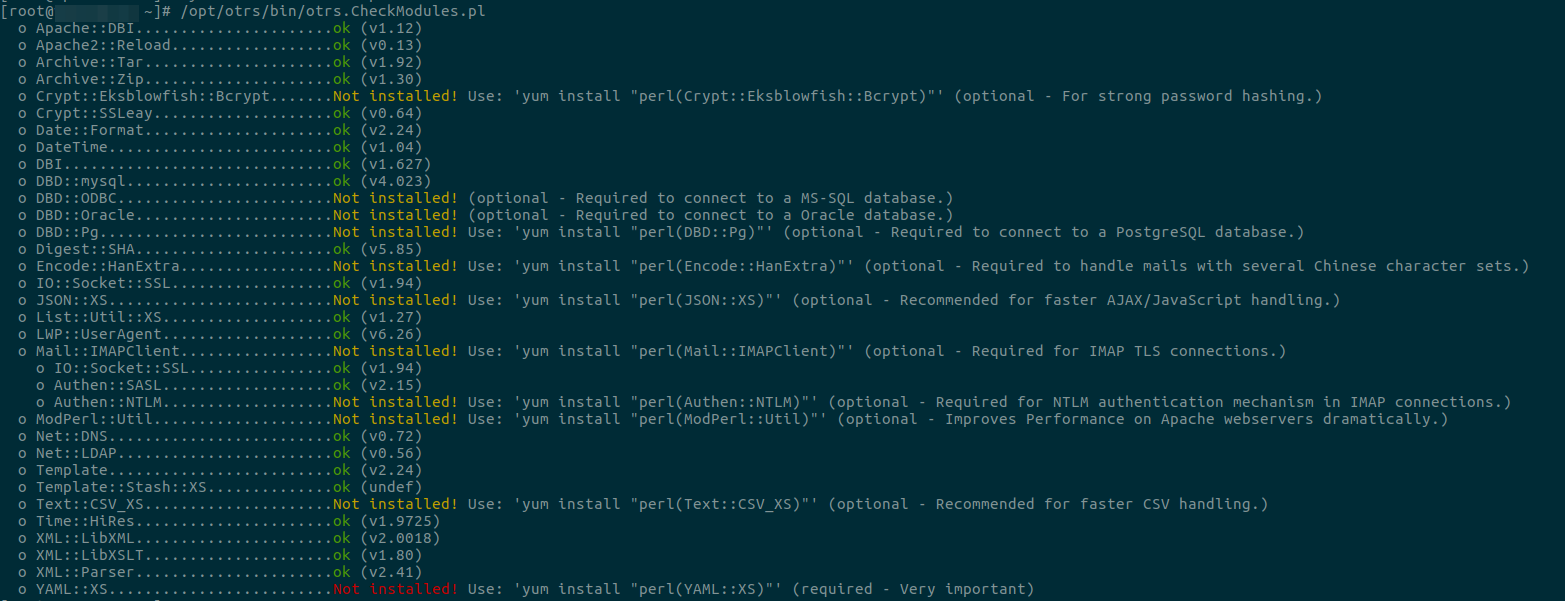
Run the following YUM command to install missing perl modules.
# yum install -y "perl(Crypt::Eksblowfish::Bcrypt)" "perl(DBD::Pg)" "perl(Encode::HanExtra)" "perl(JSON::XS)" "perl(Mail::IMAPClient)" "perl(Authen::NTLM)" "perl(ModPerl::Util)" "perl(Text::CSV_XS)" "perl(YAML::XS)"
Run the otrs.CheckModules.pl file once again to confirm all the perl modules installed successfully.
# /opt/otrs/bin/otrs.CheckModules.pl
  o Apache::DBI......................ok (v1.12)
  o Apache2::Reload..................ok (v0.13)
  o Archive::Tar.....................ok (v1.92)
  o Archive::Zip.....................ok (v1.30)
  o Crypt::Eksblowfish::Bcrypt.......ok (v0.009)
  o Crypt::SSLeay....................ok (v0.64)
  o Date::Format.....................ok (v2.24)
  o DateTime.........................ok (v1.04)
  o DBI..............................ok (v1.627)
  o DBD::mysql.......................ok (v4.023)
  o DBD::ODBC........................Not installed! (optional - Required to connect to a MS-SQL database.)
  o DBD::Oracle......................Not installed! (optional - Required to connect to a Oracle database.)
  o DBD::Pg..........................ok (v2.19.3)
  o Digest::SHA......................ok (v5.85)
  o Encode::HanExtra.................ok (v0.23)
  o IO::Socket::SSL..................ok (v1.94)
  o JSON::XS.........................ok (v3.01)
  o List::Util::XS...................ok (v1.27)
  o LWP::UserAgent...................ok (v6.26)
  o Mail::IMAPClient.................ok (v3.37)
    o IO::Socket::SSL................ok (v1.94)
    o Authen::SASL...................ok (v2.15)
    o Authen::NTLM...................ok (v1.09)
  o ModPerl::Util....................ok (v2.000010)
  o Net::DNS.........................ok (v0.72)
  o Net::LDAP........................ok (v0.56)
  o Template.........................ok (v2.24)
  o Template::Stash::XS..............ok (undef)
  o Text::CSV_XS.....................ok (v1.00)
  o Time::HiRes......................ok (v1.9725)
  o XML::LibXML......................ok (v2.0018)
  o XML::LibXSLT.....................ok (v1.80)
  o XML::Parser......................ok (v2.41)
  o YAML::XS.........................ok (v0.54)
Configure OTRS using the web installer
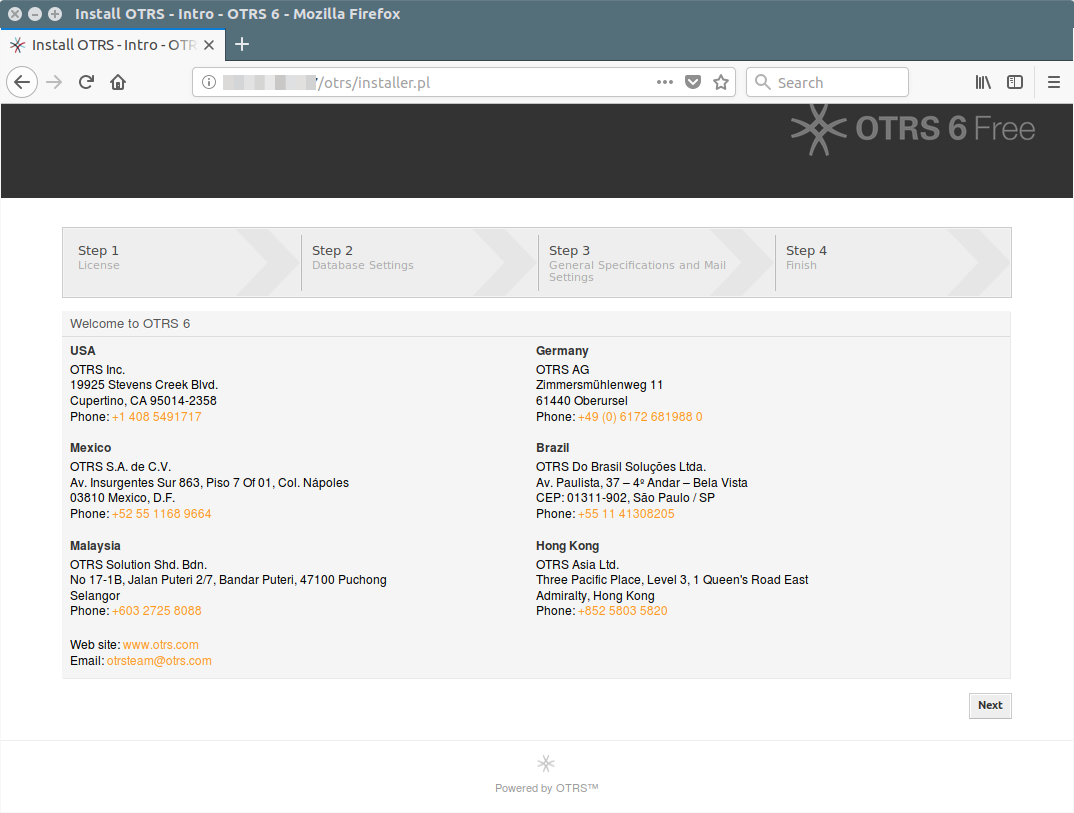
Navigate your browser to http://localhost/otrs/installer.pl to Configure OTRS using the web installer.
Follow the instruction and input the required information.
1) Welcome Page : This is welcome screen which will shows about the OTRS offices and click on Next to continue.
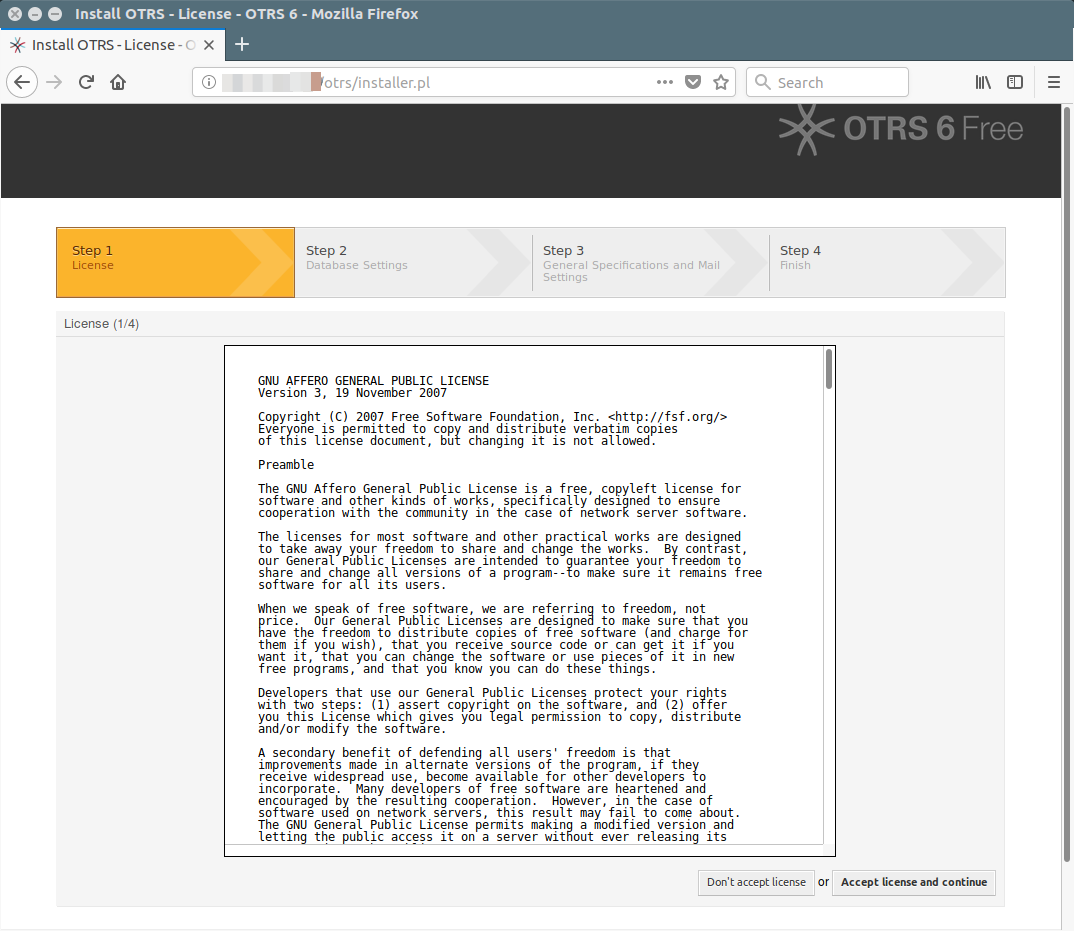
2) : Hit Accept License and Continue button to move forward to next step.
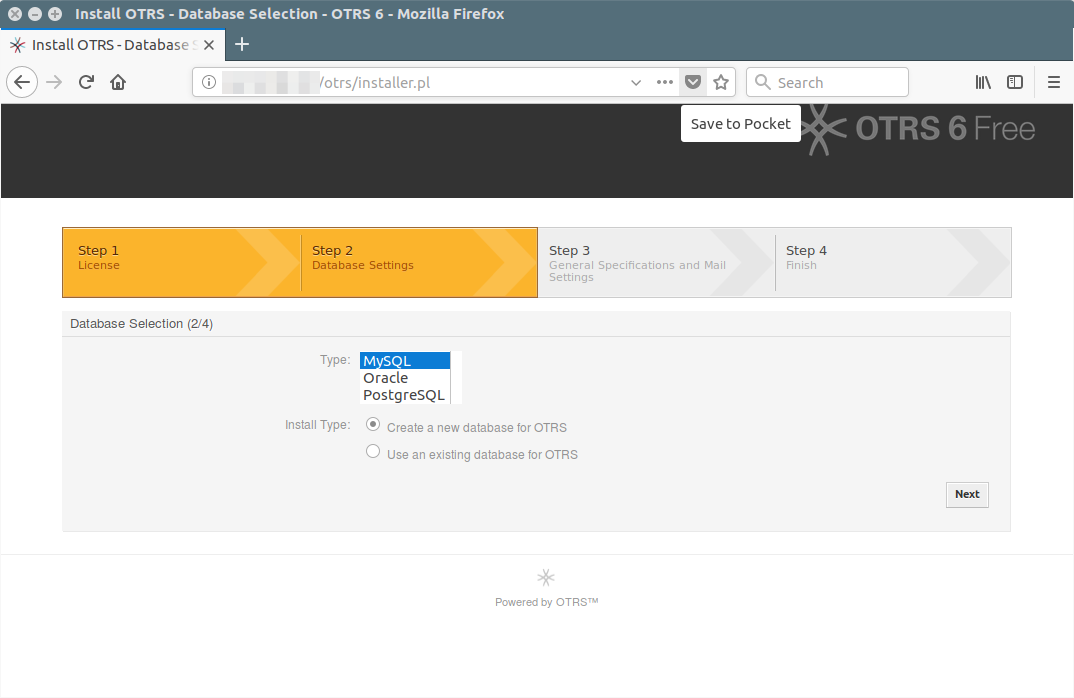
3) Database Selection : Choose the database that you want to use with OTRS. I’m going to choose MySQL which is advised by OTRS team. Then click the Next button to continue.
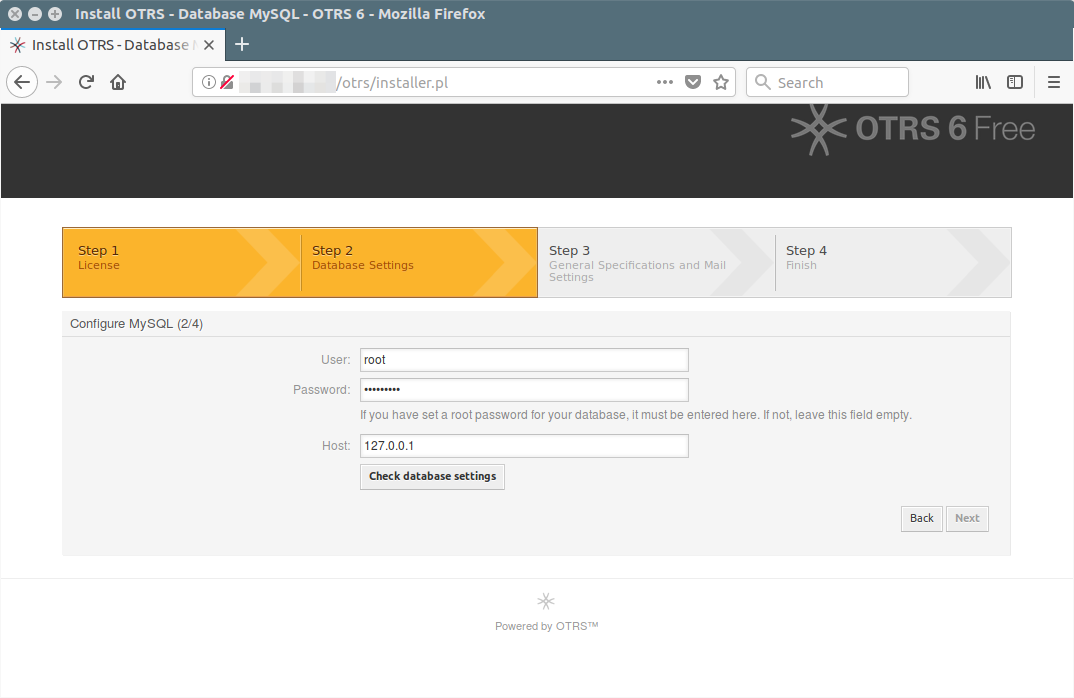
4) Validate database credentials : Input the Database Credentials and click Check Database settings to validate the given information. If it’s correct information then you should able to see the message stating that Database check successful otherwise you will get error message.
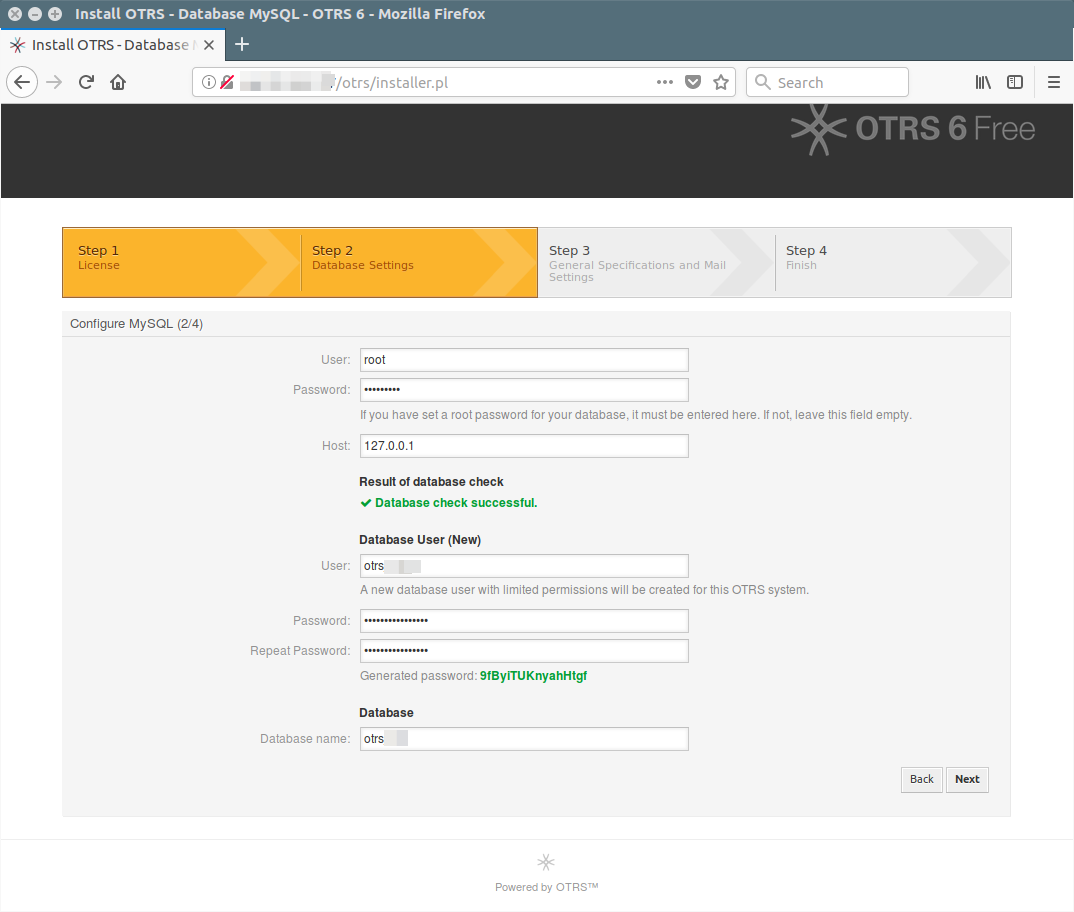
5) Configure Database : If you are able to connect your database in the above steps. Now, it’s time to create a database, database user and password then click on Next to continue.
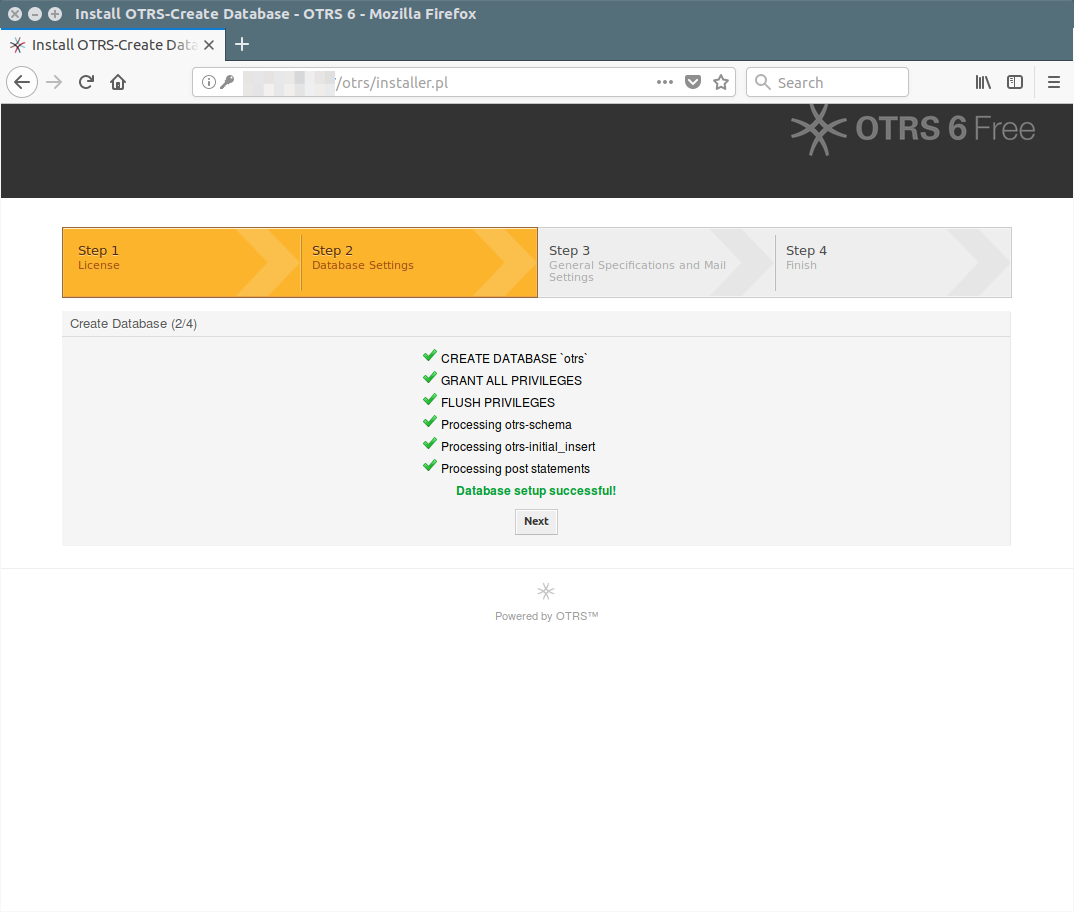
6) Database Creation: When you click the Next button in the above steps. Instantly it will create a database and grant privileges then shows Database setup successful.
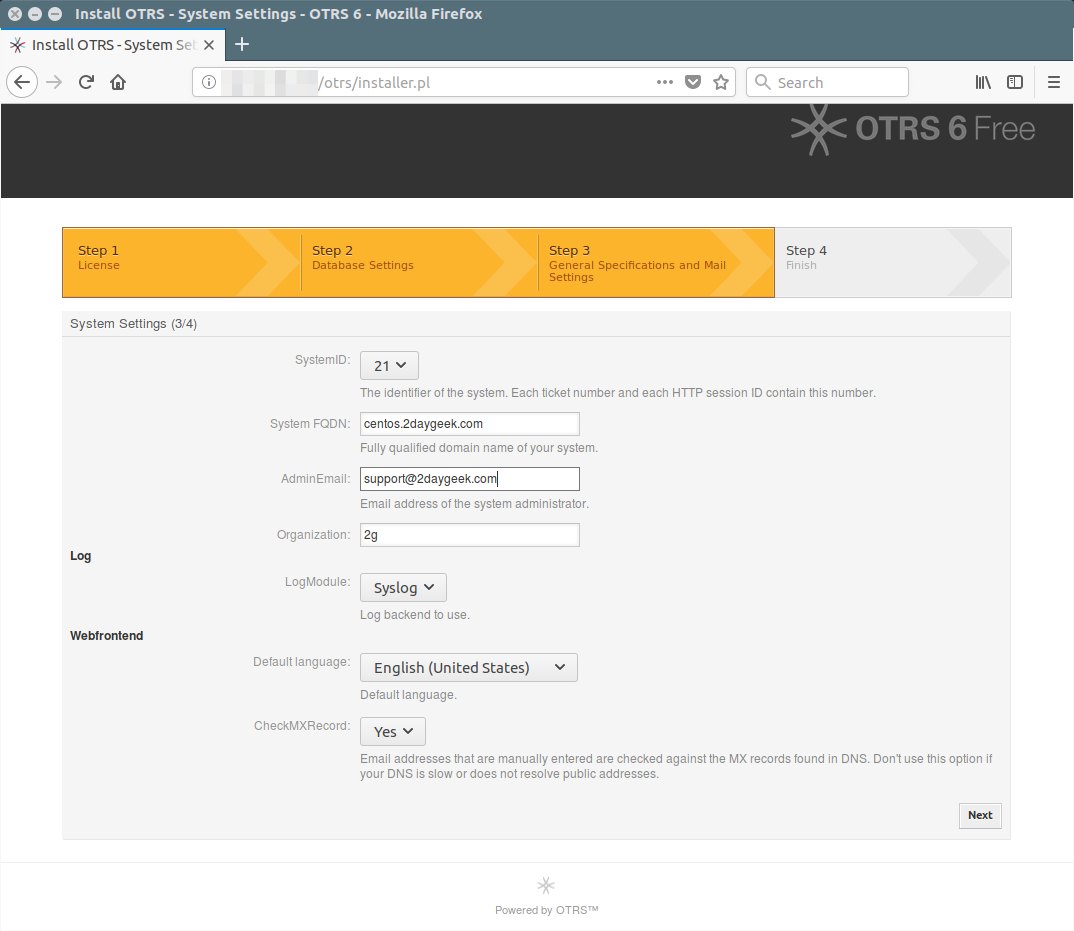
7) System Settings : Enter all the required information on this page and click on Next to continue.
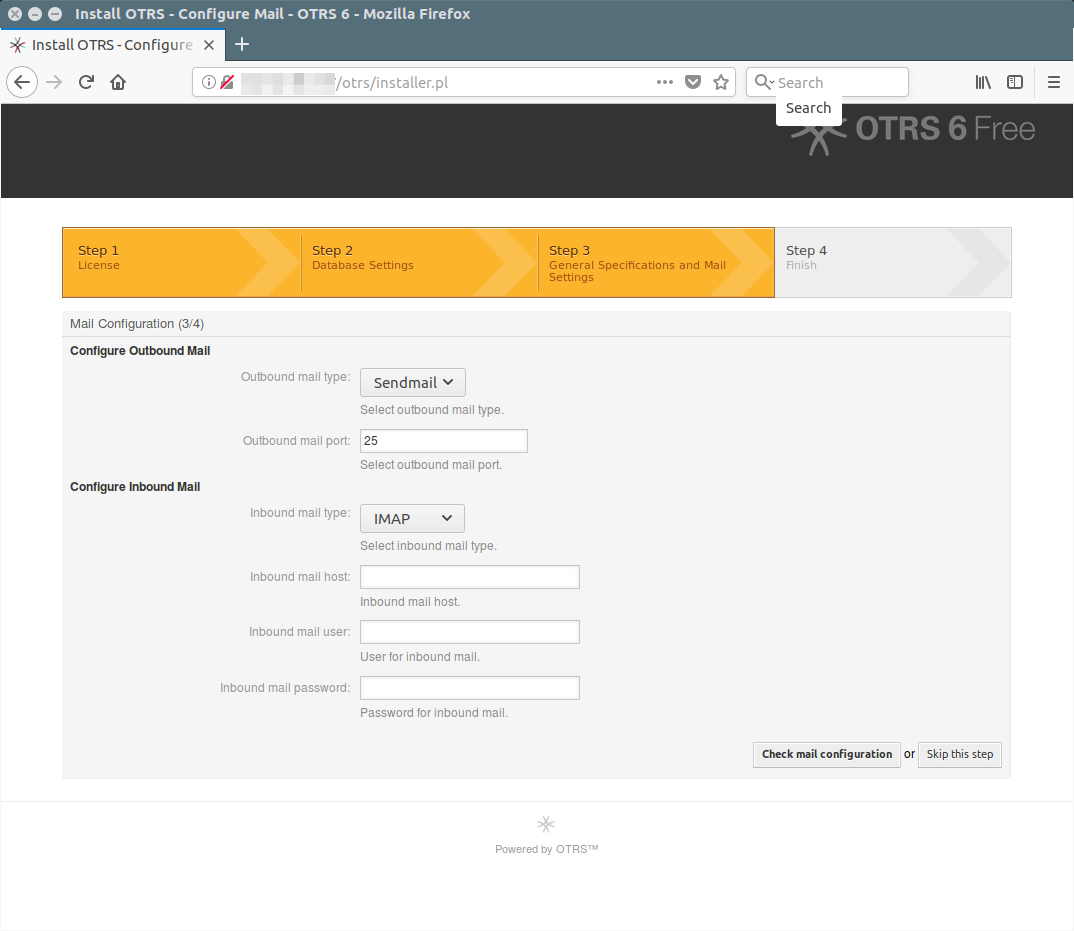
8) Mail Configuration : Enter the Inbound, Outbound and mail server information on this page and click on Next to continue.
9) Setup Completed: Congratulations! you have completed the OTRS installation. It’s time to play on it.
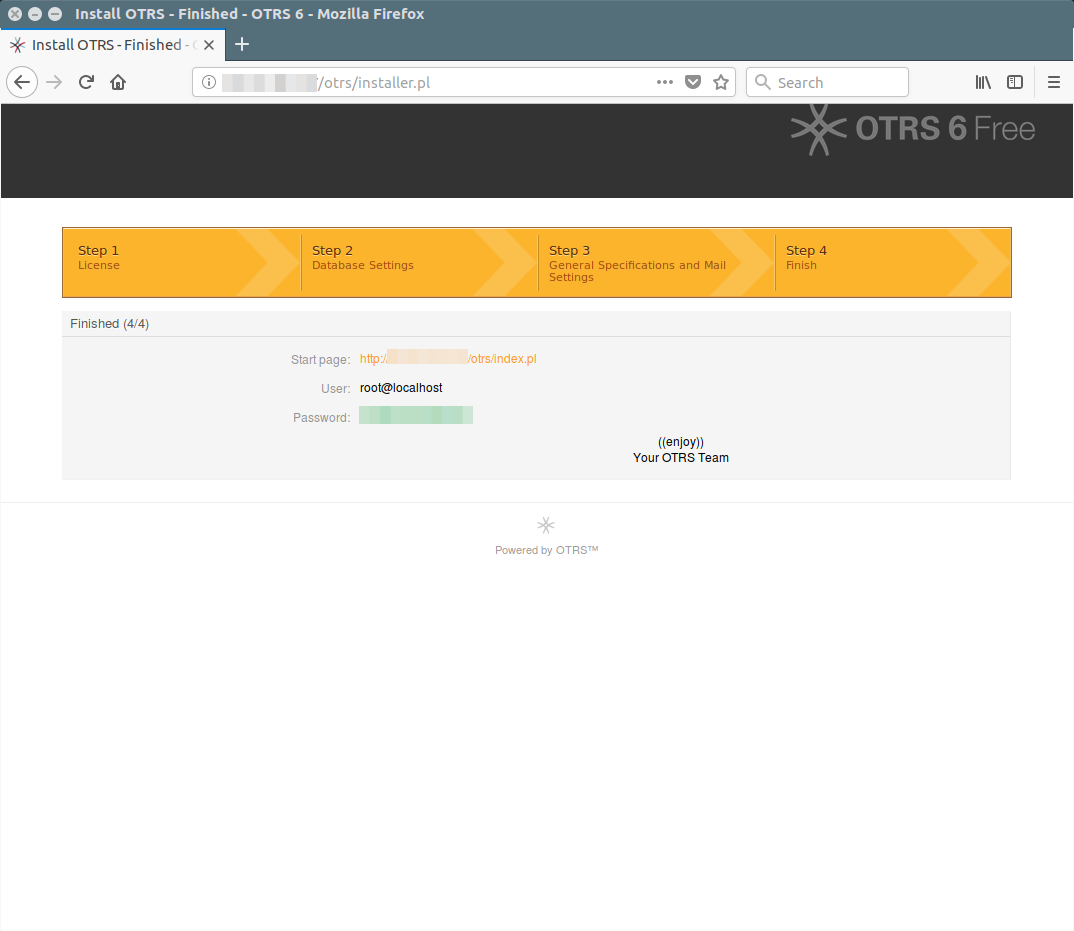
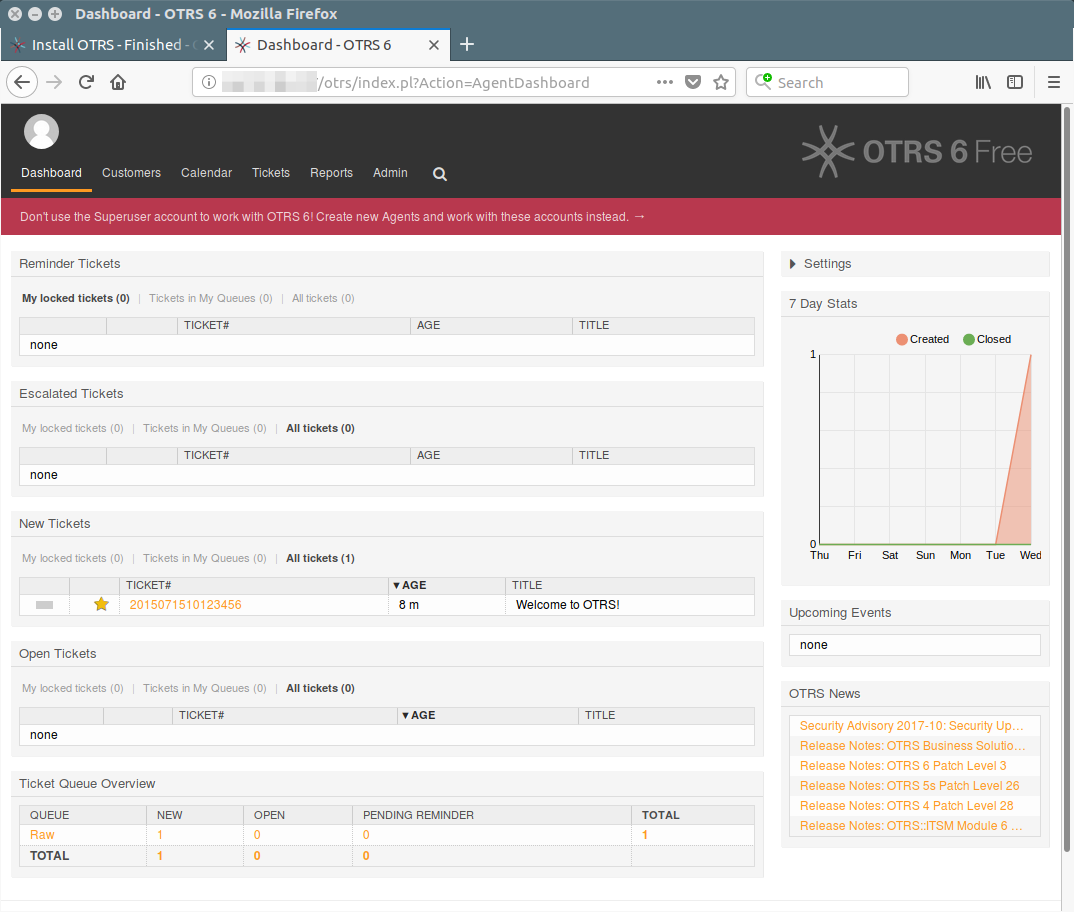
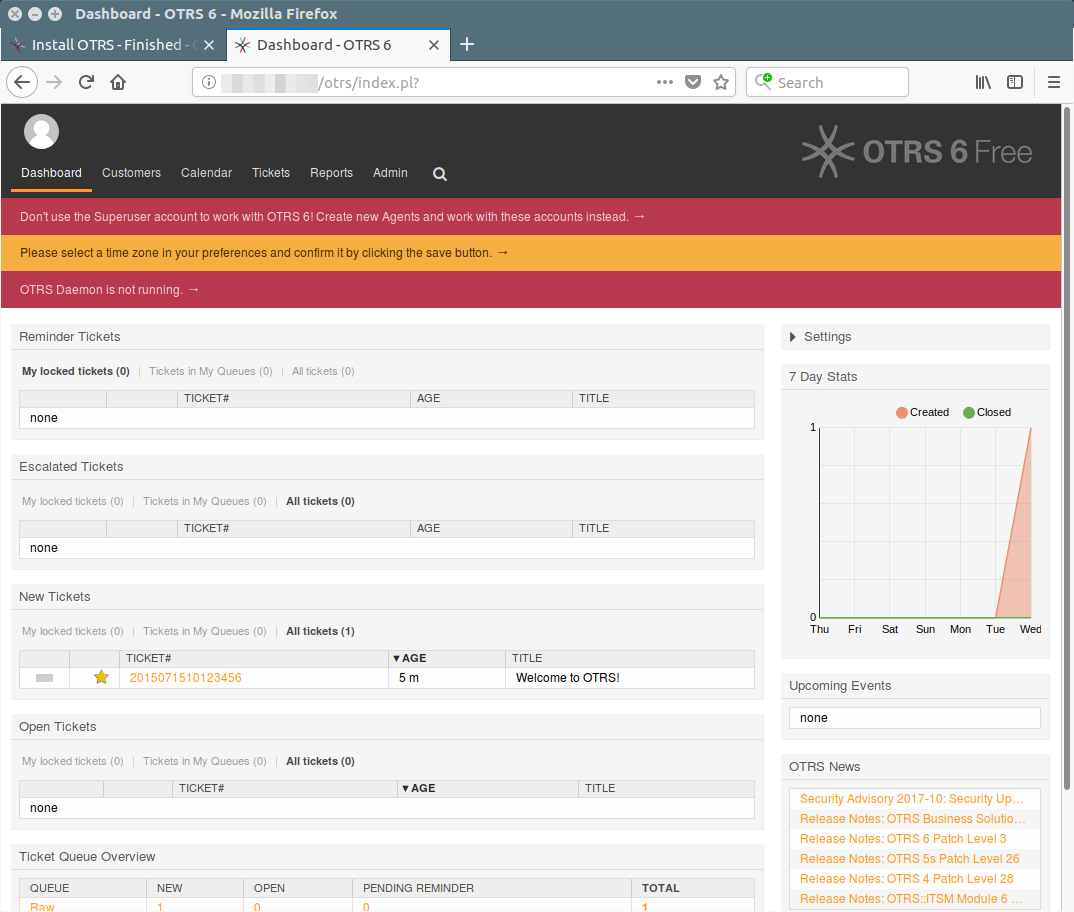
10) Access OTRS : Navigate your browser to http://localhost/otrs/index.pl to access OTRS.
To login as OTRS administrator, use the root@localhost as username and the generated password by OTRS in the above step.
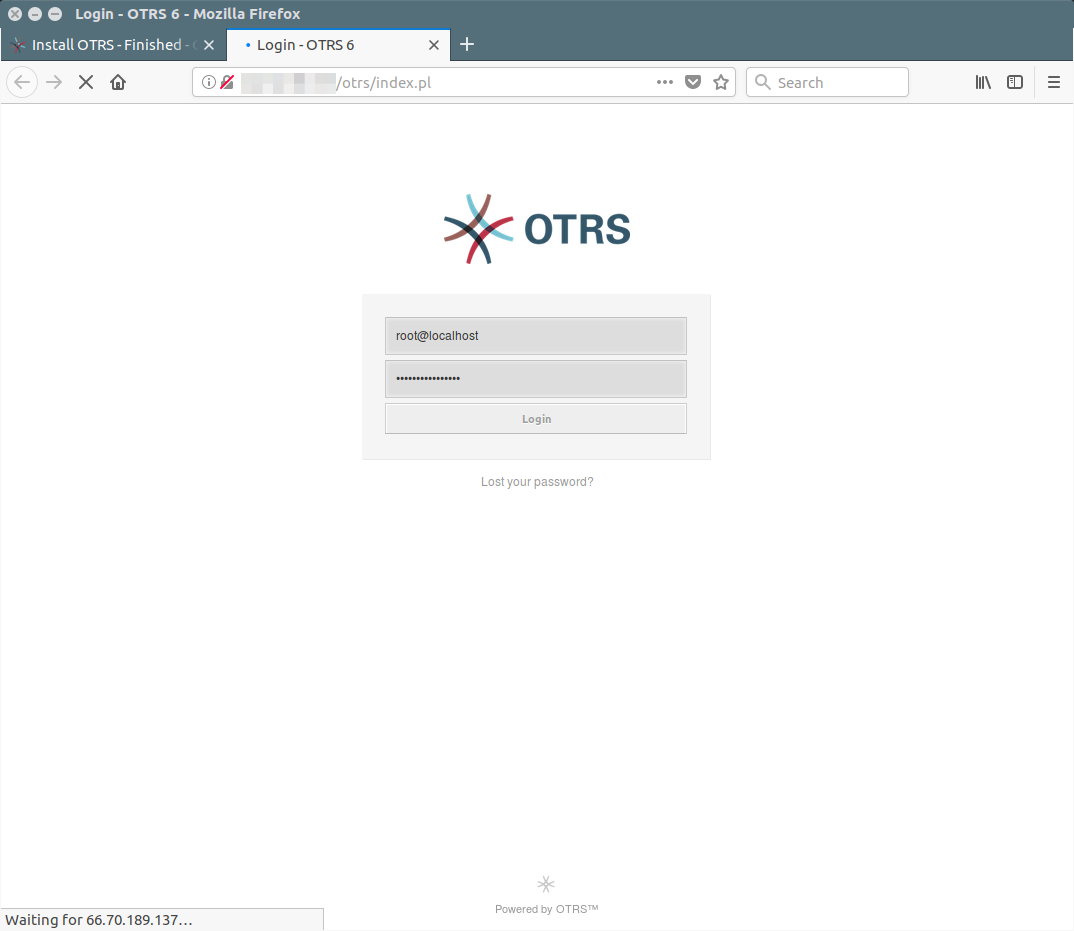
You can start configure the OTRS system to meet your needs.
11) Kick Start OTRS daemon and watchdog : Make sure you have to kick start OTRS daemon and watchdog by the otrs user.
# su - otrs
$ /opt/otrs/bin/otrs.Daemon.pl start

Manage the OTRS daemon process.

Daemon started

$ /opt/otrs/bin/Cron.sh start
(using /opt/otrs) done
After enabled OTRS daemon & watchdog, your output similar to below.