ownCloud Desktop sync client allow us to Sync our data from Desktop to owncloud server. ownCloud community announced the ownCloud desktop sync client 2.1.1 on February 10, 2016. Its time to update your ownCloud desktop sync client. ownCloud sync client automatically creates a folder in your computer under the directory (/home/username/ownCloud) while installing, Later on it will synchronize your data from the local PC to ownCloud server and vice versa so that you can access your content (Images, documents, etc..,) remotely by logging into your ownCloud account.
1) Install ownCloud Client on Linux Systems
We can easily install ownCloud Client on Ubuntu, CentOS, RHEL, Fedora, Mint, openSUSE & Debian systems by adding ownCloud Client repo.
For Debian
# Change the [Version-No] to 7.0, 8.0 #
$ wget http://download.opensuse.org/repositories/isv:ownCloud:desktop/Debian_[Version-No]/Release.key
$ sudo apt-key add - < Release.key
$ sudo sh -c "echo 'deb http://download.opensuse.org/repositories/isv:/ownCloud:/desktop/Debian_[Version-No]/ /' >> /etc/apt/sources.list.d/owncloud-client.list"
$ sudo apt-get update
$ sudo apt-get install owncloud-client
For Ubuntu
# Change the [Version-No] to 12.04, 14.04, 14.10, 15.04, 15.10 #
$ wget http://download.opensuse.org/repositories/isv:ownCloud:desktop/Ubuntu_[Version-No]/Release.key
$ sudo apt-key add - < Release.key
$ sudo sh -c "echo 'deb http://download.opensuse.org/repositories/isv:/ownCloud:/desktop/Ubuntu_[Version-No]/ /' >> /etc/apt/sources.list.d/owncloud-client.list"
$ sudo apt-get update
$ sudo apt-get install owncloud-client
For LinuxMint 17.1, 17.2, 17.3
$ wget http://download.opensuse.org/repositories/isv:ownCloud:desktop/Ubuntu_15.04/Release.key
$ sudo apt-key add - < Release.key
$ sudo sh -c "echo 'deb http://download.opensuse.org/repositories/isv:/ownCloud:/desktop/Ubuntu_15.04/ /' >> /etc/apt/sources.list.d/owncloud-client.list"
$ sudo apt-get update
$ sudo apt-get install owncloud-client
For CentOS 7, 6
# Change the [Version-No] to 7, 6 #
# yum-config-manager --add-repo=http://download.opensuse.org/repositories/isv:ownCloud:desktop/CentOS_[Version-No]/isv:ownCloud:desktop.repo
# yum install owncloud-client
For RHEL 7, 6
# Change the [Version-No] to 7, 6 #
# yum-config-manager --add-repo=http://download.opensuse.org/repositories/isv:ownCloud:desktop/RHEL_[Version-No]/isv:ownCloud:desktop.repo
# yum install owncloud-client
For Fedora 23, 22, 21
# Change the [Version-No] to 21, 22, 23 #
# dnf config-manager --add-repo=http://download.opensuse.org/repositories/isv:ownCloud:desktop/Fedora_[Version-No]/isv:ownCloud:desktop.repo
# yum install owncloud-client     # Upto Fedora 21 #
# dnf install owncloud-client     # Fedora 22 later #
For openSUSE 13.1, 13.2, 42.1
# Change the [Version-No] to 13.1, 13.2, 42.1 #
# zypper addrepo http://download.opensuse.org/repositories/isv:ownCloud:desktop/openSUSE_[Version-No]/isv:ownCloud:desktop.repo
# zypper refresh
# zypper install owncloud-client
2) Upgrade ownCloud Client on Linux Systems
We can easily upgrade ownCloud Client on Ubuntu, CentOS, RHEL, Fedora, Mint, openSUSE & Debian systems by firing below commands because we have already added ownCloud Desktop repo.
# Upgrade on RPM based systems #
# [yum|dnf|zypper] upgrade owncloud-client

# Upgrade on DEB based systems #
$ sudo apt-get install --only-upgrade owncloud-client
Step-1
Now, its successfully installed.You can navigate your owncloud desktop client sync app, by clicking Search in your computer and online sources icon from topmost left on your PC and type owncloud then click the owncloud desktop client sync icon to lunch the App.

Step-2
Enter your owncloud installation url and hit NEXT button.

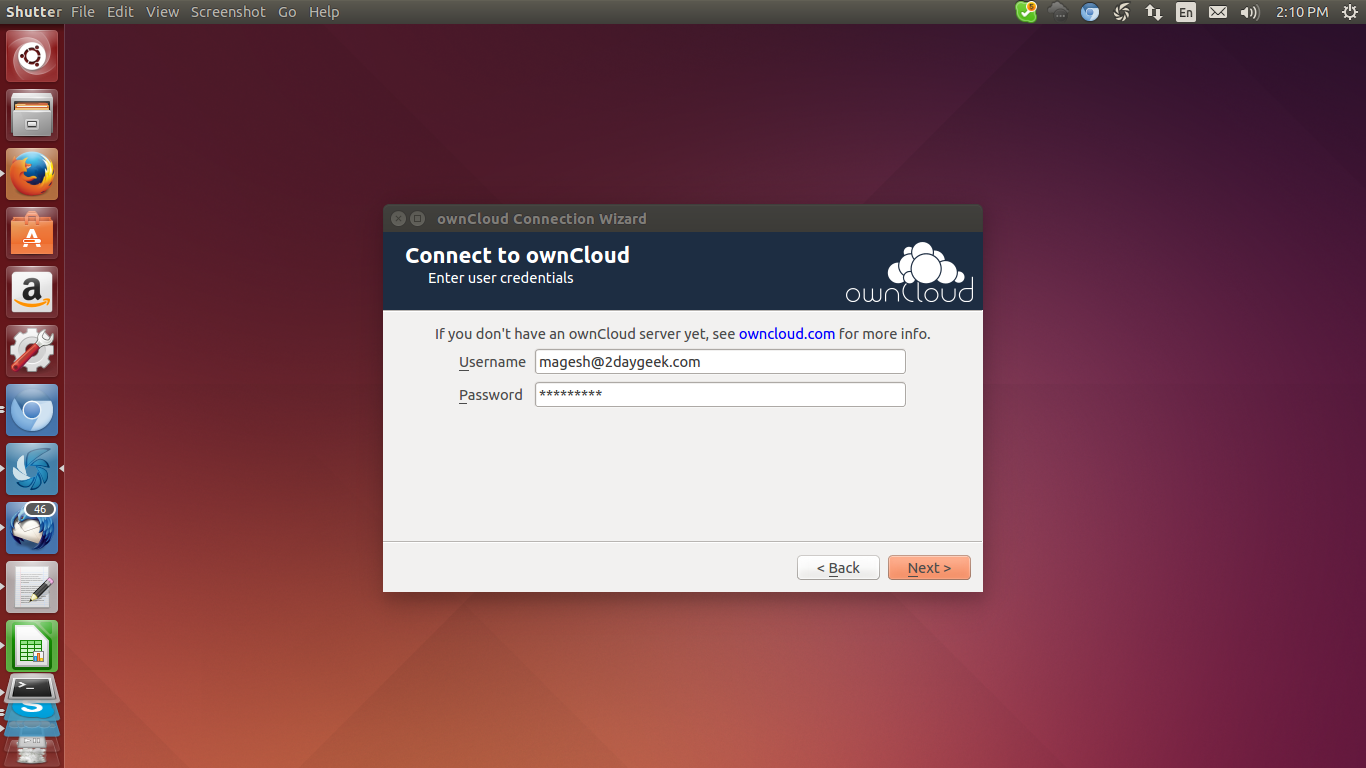
Step-3
Enter your owncloud user name & its password and hit NEXT button.
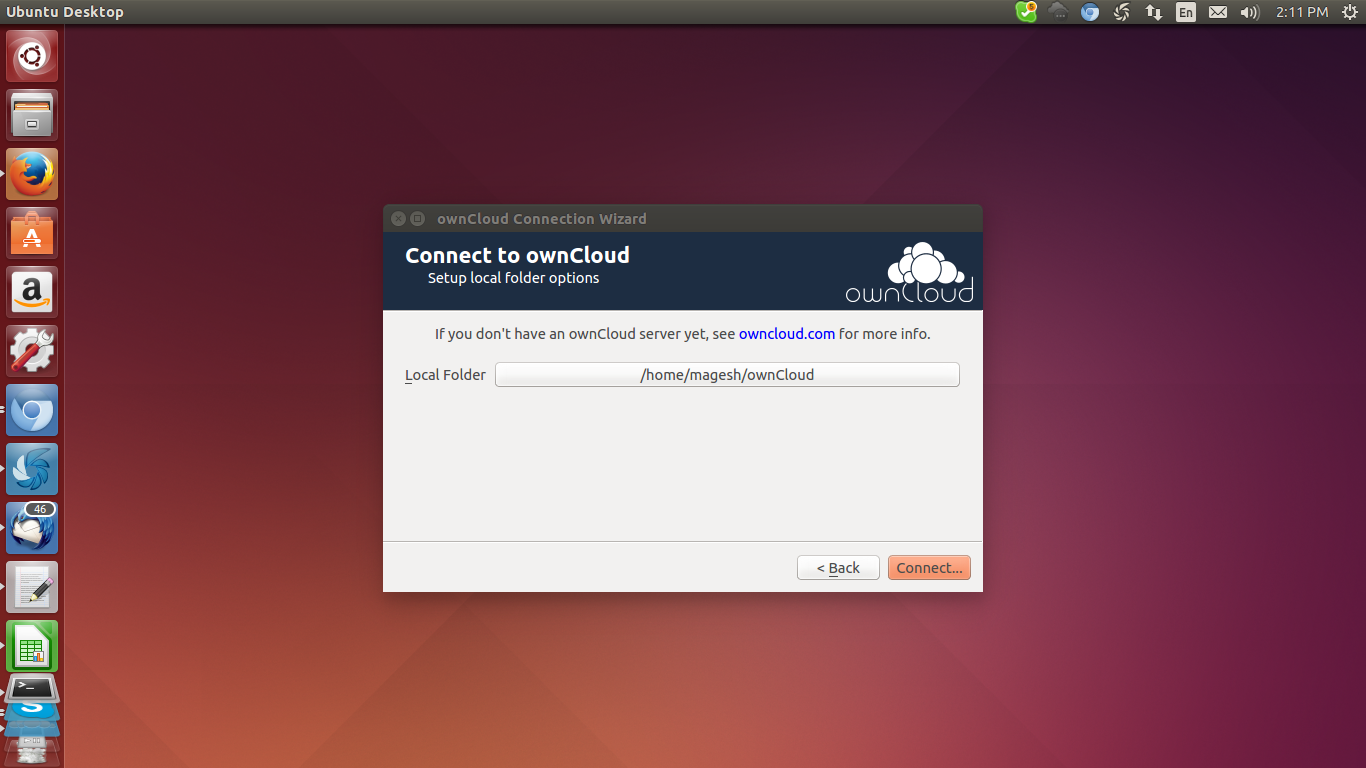
Step-4
Now, Its shows your owncloud home directory and hit CONNECT button.
Step-5
Everything set up successfully and your files also synced from your owncloud server to local PC.
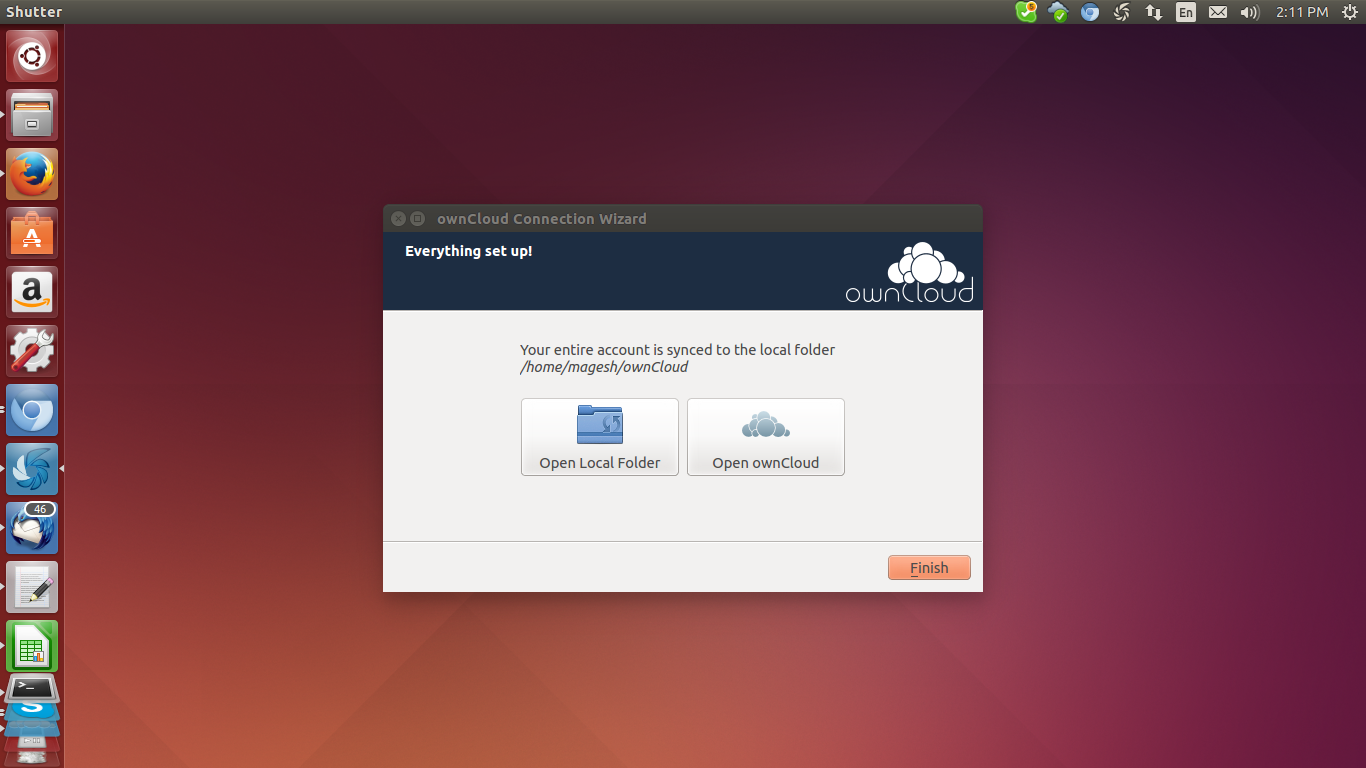
Step-6
Click Open Local Folder then hit
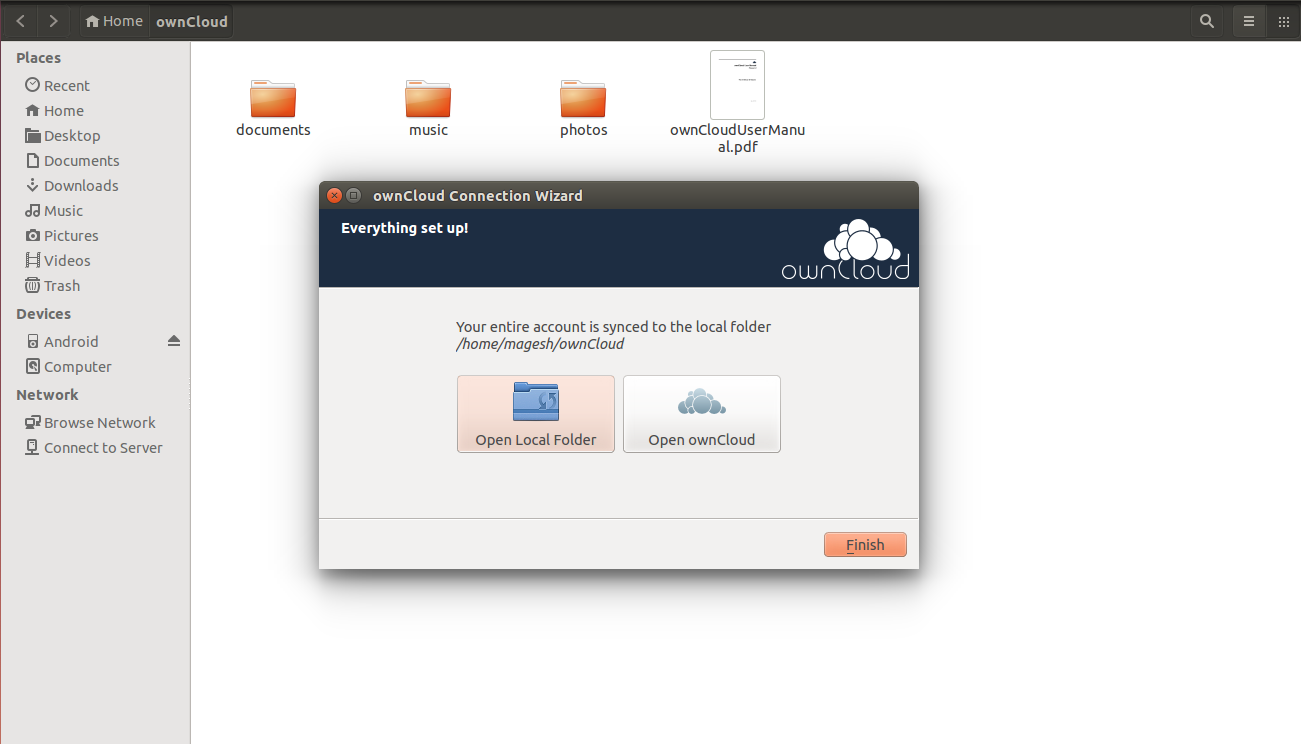
Step-7
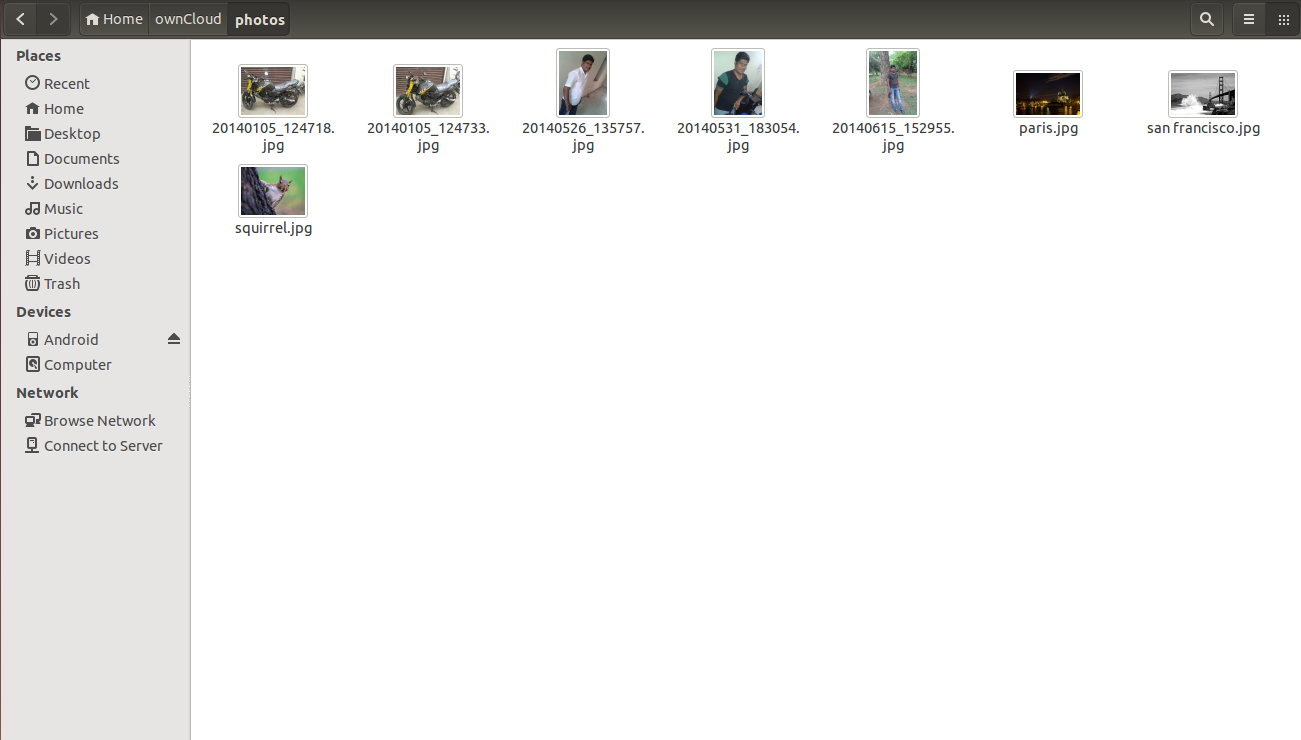
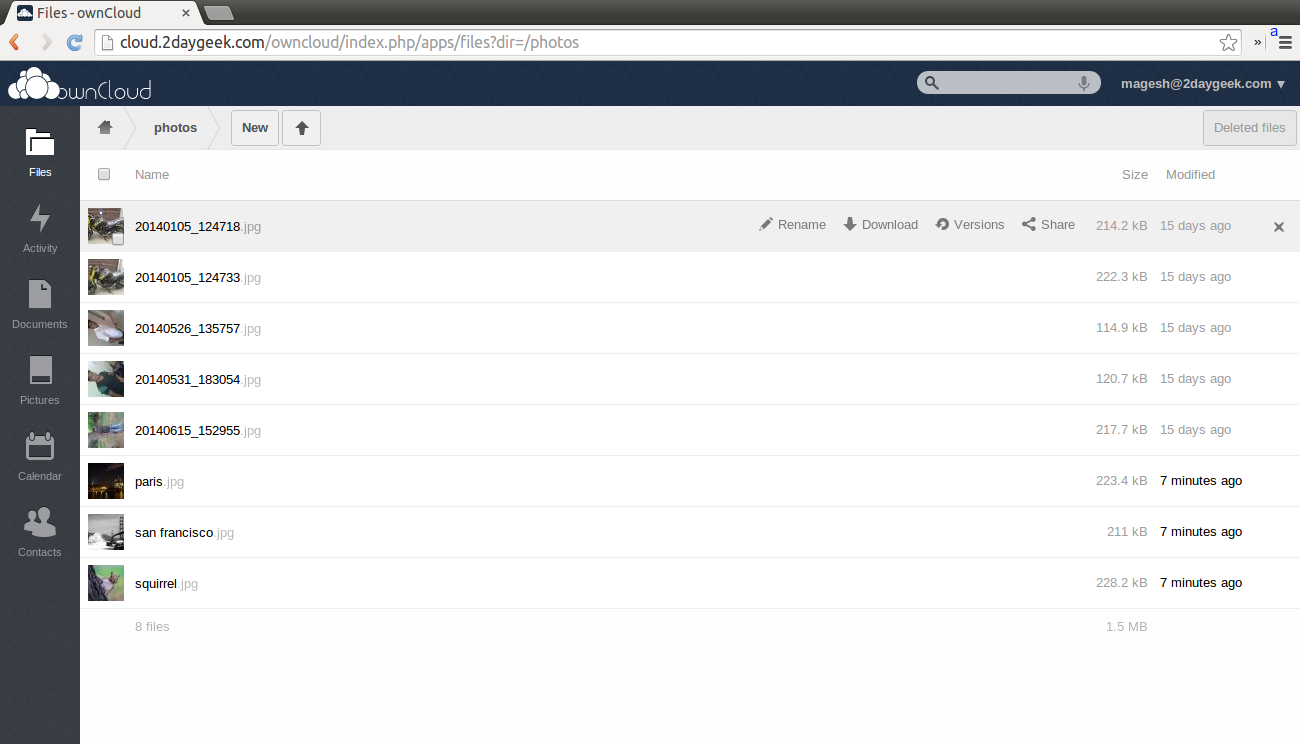
In local folder, i have copied five photos and going to check the web interface whether its synced or not.
Step-8
Yes, Everything is synced automatically.
We are preparing all articles in-depth to understand by all level/stage Linux administrators. If the article is useful for you, then please spend less than a minute to share your valuable comments in our commenting section.
Please stay tune with us…Good Luck.


Buenos dias al realizar la instalacion en linux centos 6.8 me genera el siguiente error:
Las llaves GPG listadas para el repositorio “The ownCloud Desktop Client (RHEL_6)” ya se encuentran instaladas, pero con este paquete no son correctas.
Verifique que las URLs de la llave para este repositorio estén correctamente configuradas.
Por favor solicito ayuda, Muchas gracias.