Use Down Arrow and choose Free Space, then Choose New partition >> Enter partition size 2G or 2048M >> choose the type of partition primary >> Then, select Write to write the partition table >> Finally choose Yes to save the changes.
Use Down Arrow and choose Free Space, then Choose New partition >> Enter partition size 18G or 18432M >> choose the type of partition Extended >> Then, Use Down Arrow and choose Free Space, then Choose New Enter partition size 18G or 18432M >> Then, select Write to write the partition table >> choose Yes to save the changes >> Finally choose Quit to exit from partition manager.
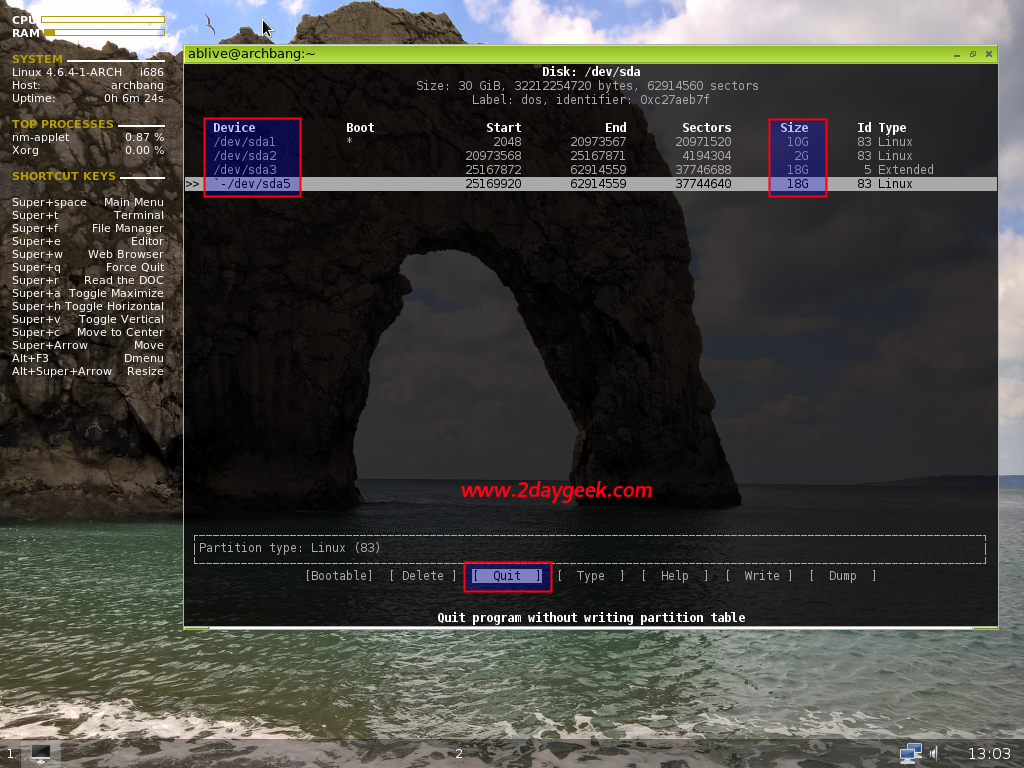
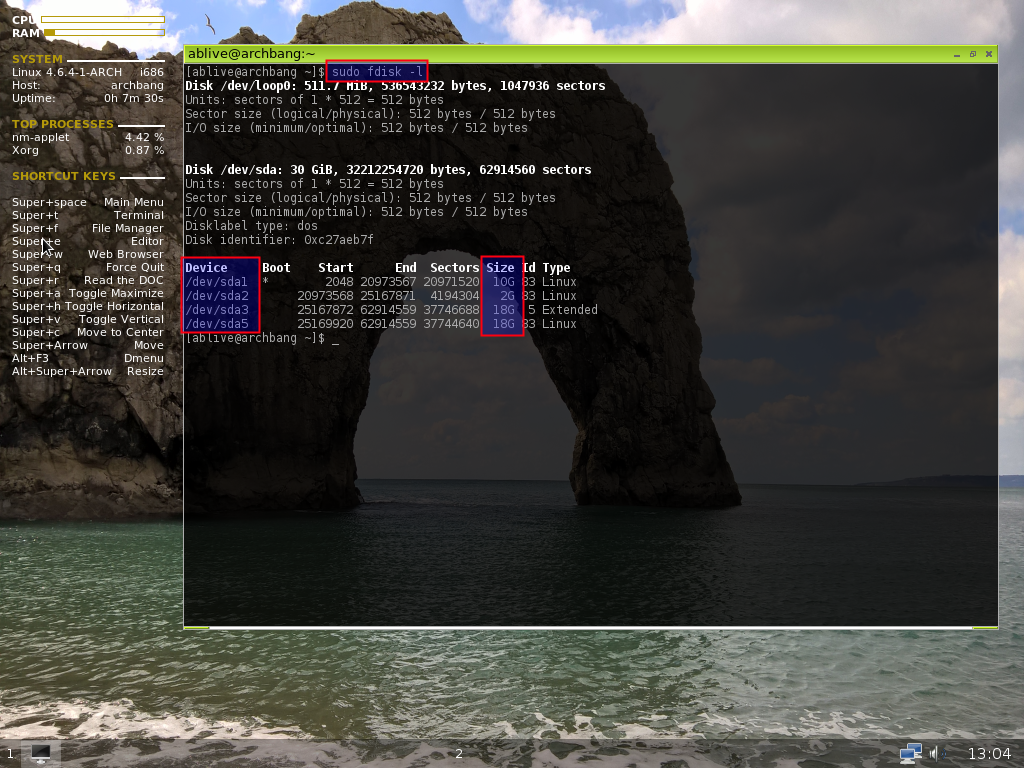
Verify the newly created partitions
$ sudo fdisk -l
It’s time to create file system by firing below commands
$ sudo mkfs.ext4 /dev/sda1
$ sudo mkfs.ext4 /dev/sda5
format and activate the Swap partition
$ sudo mkswap /dev/sda2
$ sudo swapon /dev/sda2
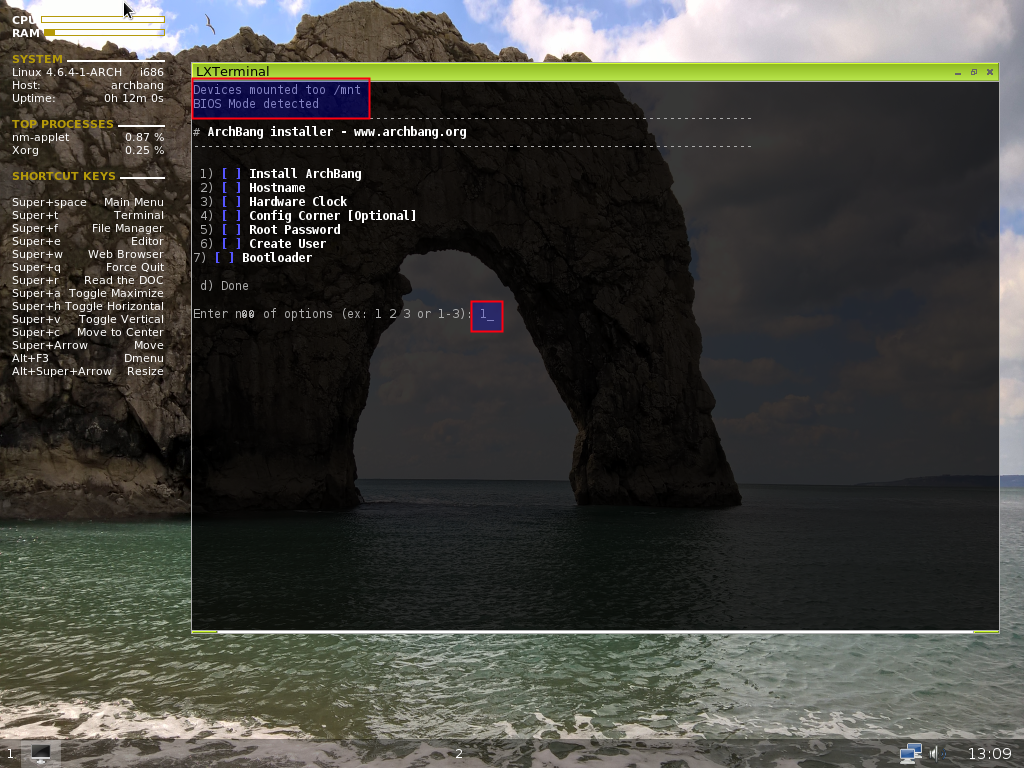
Install ArchBang
Created Disk Partitions, created file system and mounted successfully, Now time to initiate the ArchBang OS installation by selecting the Install option from context menu.
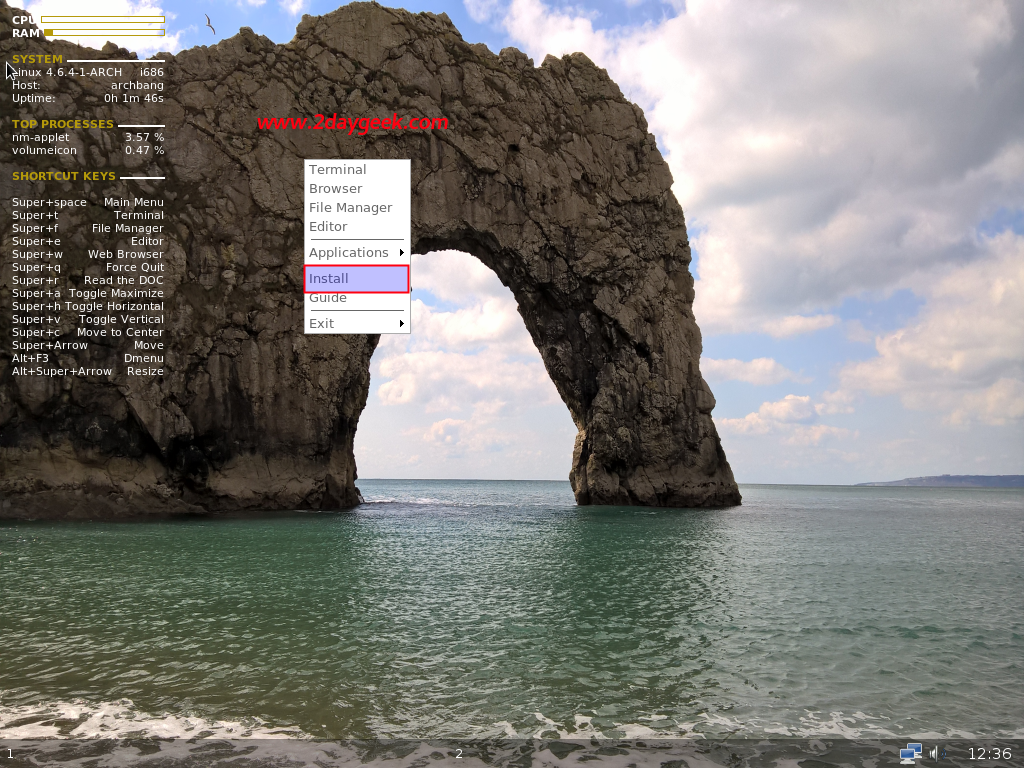
See the below screenshot, you have to complete the below 7 steps to get fresh ArchBang OS.