EtherCalc
EtherCalc is a Web Based Collaborative Spreadsheet similar to google drive. Your data is saved on the web, and many people can edit the same document at the same time. Everybody’s changes are instantly reflected on all screens. You can share your sheet to your friends and work together anywhere.
1) Installing pre-required packages
Before installing ethercalc, we need to install pre-required packages to install smoothly.
magesh@magesh-desktop:~$ sudo apt-get update && apt-get upgrade
magesh@magesh-desktop:~$ sudo apt-get install build-essential git perl python
2) Installing nodejs
Ethercalc is using nodejs runtime to work. nodejs is perfect for data-intensive real-time applications that run across distributed devices.
magesh@magesh-desktop:~$ sudo apt-get install python-software-properties
magesh@magesh-desktop:~$ sudo apt-add-repository ppa:chris-lea/node.js
magesh@magesh-desktop:~$ sudo apt-get update
magesh@magesh-desktop:~$ sudo apt-get install nodejs
3) Installing Redis
Redis is an open source software which is used for advanced key-value cache and store. It is often referred to as a data structure server. If we running Redis server in our system, EtherCalc will prefer it over file-based storage to improve performance.
magesh@magesh-desktop:~$ sudo apt-get install python-software-properties
magesh@magesh-desktop:~$ sudo add-apt-repository ppa:rwky/redis
magesh@magesh-desktop:~$ sudo apt-get update
magesh@magesh-desktop:~$ sudo apt-get install redis-server

# checking redis server status #
magesh@magesh-desktop:~$ redis-cli ping
PONG
4) Downloading / Installing ethercalc
Clone / Downloading ethercalc files from github
magesh@magesh-desktop:/opt$ sudo git clone https://github.com/audreyt/ethercalc.git
Cloning into 'ethercalc'...
remote: Counting objects: 3043, done.
remote: Compressing objects: 100% (15/15), done.
remote: Total 3043 (delta 1), reused 16 (delta 1)
Receiving objects: 100% (3043/3043), 4.18 MiB | 991.00 KiB/s, done.
Resolving deltas: 100% (1159/1159), done.
Checking connectivity... done.

# instlling ethercalc #
magesh@magesh-desktop:/opt$ sudo npm install -g ethercalc

# start ethercalc #
magesh@magesh-desktop:/opt$ ethercalc
Please connect to: http://magesh-desktop:8000/
Starting backend using webworker-threads
Express server listening on port 8000 in development mode
Zappa 0.5.0 "You can't do that on stage anymore" orchestrating the show
Connected to Redis Server: localhost:6379
==> Regenerated snapshot for magesh
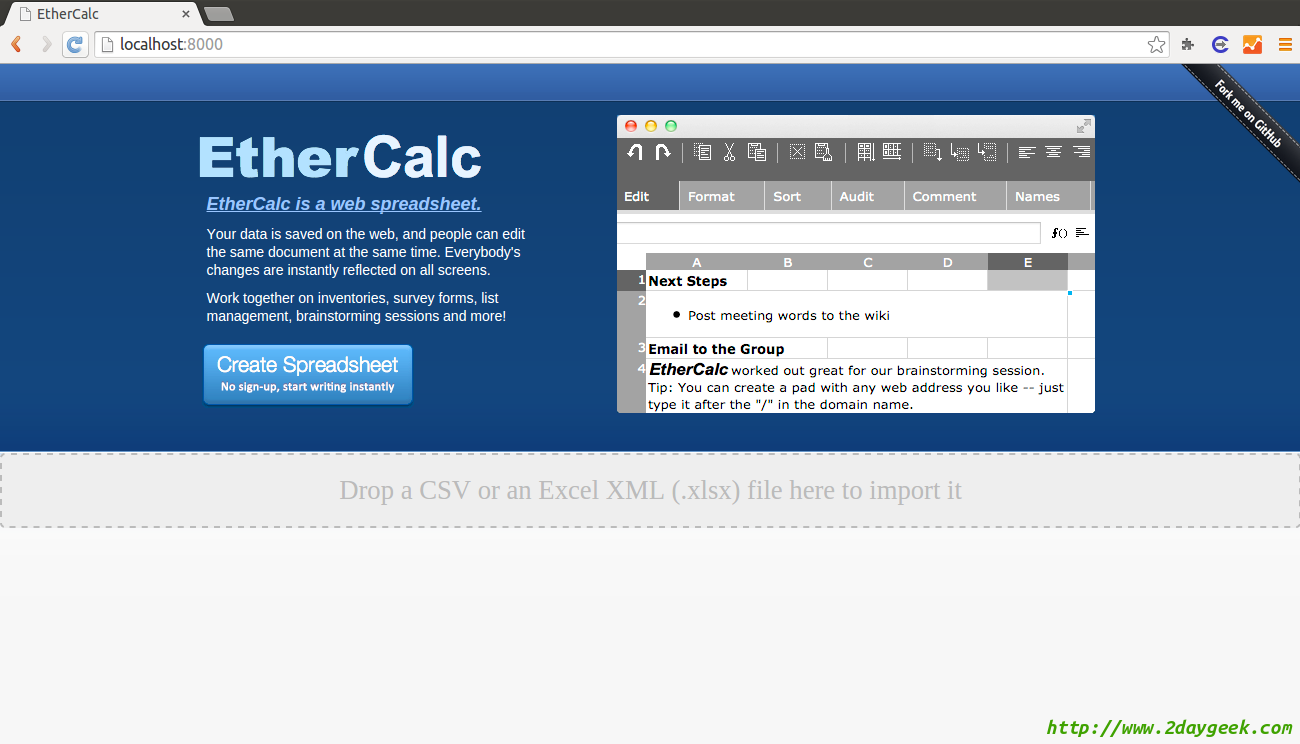
Navigate to http://localhost:8000 or http://your-IP:8000 to open ethercalc default page, see the below screen shot for ethercalc default page.
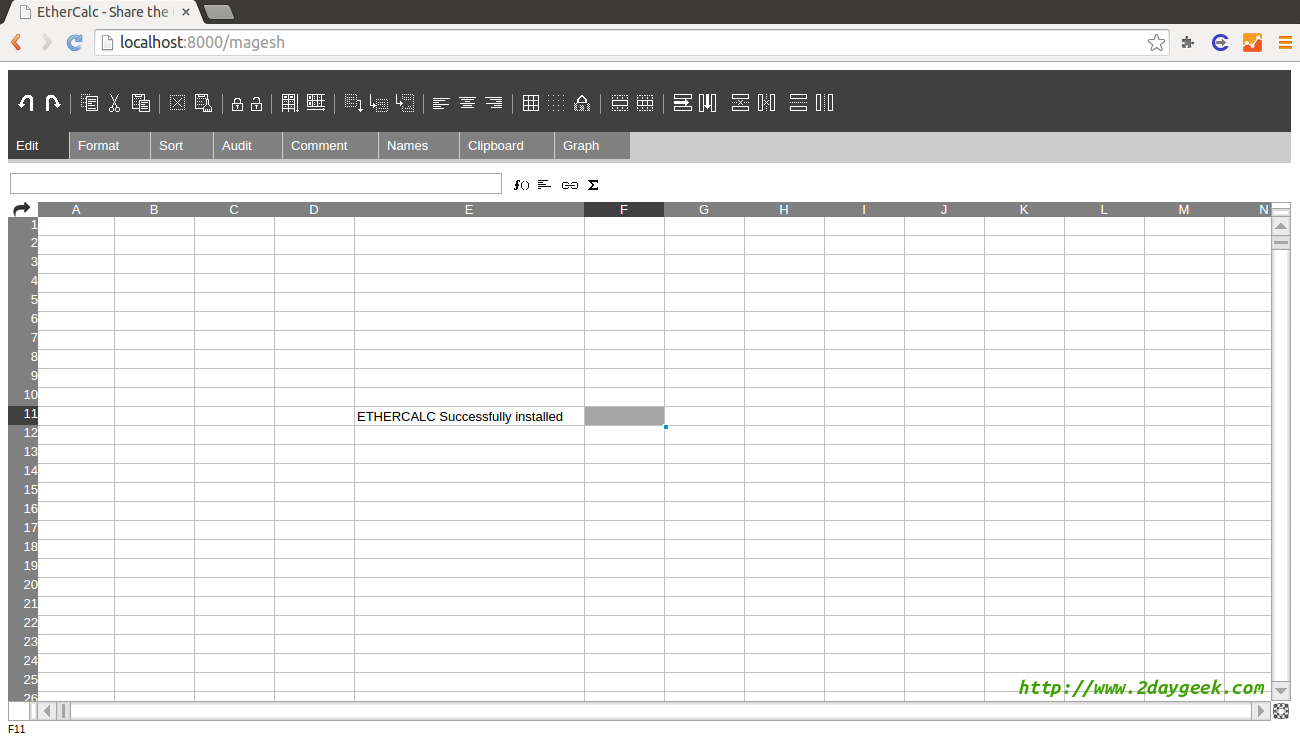
If you want new sheet, just type /sheet-name follwed by http://localhost:8000. It will create it.
Referece : ethercalc home page
@adityayp:disqus,
Take the backup of /var/redis/xxxx/dump.rdb for spreedsheet.
i can’t find it..
[root@localhost var]# cd /var/redis
bash: cd: /var/redis: No such file or directory
redis also has been running
[root@localhost var]# service redis status
redis-server (pid 1632) is running…
is there any step that i missed it?
thanks
Magesh,
Many thanks for the tutorial.
It’s work for me..
I want to know, where ethercalc document is saved on server?
Because i want to backup this document periodically..
Thanks
Hi,
it’s a really good howto!
everything runs fine, except the last command.
I got the information “Connected to Redis Server: localhost:6379”. But I do not get the “==> regenerated snapshot for …”. However the application runs successfully. But I cannot go on working in the shell cause the process of starting ethercalc stays after the described information.
I installed ethercalc exactly following your howto except the installation path /var/www. Parallel runs an owncloud instance with mysql.
Do you have any ideas why it does not runs completely?
Thanks
Hey,
I got later the following information:
” join [log-nurtmib685hf_formdata] [user-0.9822860635730972]
join [log-nurtmib685hf] [user-0.9822860635730972]
on disconnect
join [log-nurtmib685hf_formdata] [user-0.5115819212819284]
join [log-nurtmib685hf] [user-0.5115819212819284]
on disconnect”
Can you please share the output # ethercalc of the command.
Hey,
thanks for your fast reply.
The output to the #ethercalc command is almoust the output you described in the howto:
Please connect to: http://192.168.2.201:8000/
Starting backend using webworker-threads
Express server listening on port 8000 in development mode
Zappa 0.5.0 “You can’t do that on stage anymore” orchestrating the show
Connected to Redis Server: localhost:6379
After waiting for some minutes I got the following output:
I got later the following information:
” join [log-nurtmib685hf_formdata] [user-0.9822860635730972]
join [log-nurtmib685hf] [user-0.9822860635730972]
on disconnect
join [log-nurtmib685hf_formdata] [user-0.5115819212819284]
join [log-nurtmib685hf] [user-0.5115819212819284]
on disconnect”
While waiting I am not able to give new commands, I guess the system is loading / running.
The interessting point is that I can use ethercalc in the browser while waiting for the output. When the output is shown I cannot use ethercalc.
No need to install in /var/www and we can install anywhere.
Thank you for this very helpful tuto! Works very well!
@Francoist,
Welcome.
Hi!
Thanks for that howto, it helped me a lot to setup ethercalc on my dedicated server.
I added an nginx proxy to have accessible from the outside world through https.
I was wondering if there was any place in the files where I could edit things (i don’t actually know what), or where are stored all the pads (if I want to back up everything for example!)
thank you again!